Loading...
Loading...
Loading...
Loading...
Loading...
Loading...
Loading...
Loading...
Loading...
Loading...
This page will gather knowledge and guides about animations.
This page and its subpages contain links to guides about making animations and poses (static animations) for Cyberpunk 2077 and importing them into the game. For theoretical information, please refer to the Animations part of the knowledge base.
For individual guides, please check the sub-pages in the navigation tree or use the "Next" button at the bottom of this page to browse through.
This guide will teach you how to make your own static poses in Blender and import them into an existing .anim file.
You can use the same process to make photo mode replacers or create animations with multiple keyframes.
This walks you through the process of hooking an existing .anims file up with AppearanceMenuMod.
How to add standalone poses to photo mode (rather than making replacers)
How to replace the default set of expressions with those from an NPC
How to update pose packs for Patch 2.2. and ArchiveXL 1.19
Published: January 3 by @nutboy Last documented update: January 4 2025 by
This page is for both modders AND mod users who made or installed pose packs before patch 2.2 released, and want pose packs to be compatible with:
new vanilla Photomode NPC
modded Photomode NPV added with ArchiveXL
Luckily you only need to edit the .yaml and the .xl file!
You can use python scripts to update all pose packs in your mod folders, or update each pose pack by hand.
MAKE A BACKUP OF YOUR MOD FILES.
Create a folder on your desktop (or anywhere that isn't your Cyberpunk2077 folder) with a copy of all the .xl files in your archive/pc/mods folder, and also make a copy of your r6/tweaks folder before proceeding.
Tip: The quick and dirty way I do this is by selecting the files or folder I want to make a backup of, and then right clicking and sending it to a zip file. If I mess up, I unzip the backup file and overwrite the files in my mod folders.
Download these two Python Scripts from GitHub using the download button ⬇ on the far right. Save them somewhere in your computer. (I have a dedicated folder for Python scripts now)
If it's your first time, follow the wiki guide for running Python scripts. Setup is fast and easy.
Open the folder containing your Python scripts in Windows Explorer
Type cmd into the address bar, and press enter. This will open a command window.
Type the following and press enter (you can autocomplete with the Tab key) :
The script will now ask you for the path to your mods folder
Open The Cyberpunk 2077 Game Directory in a Windows Explorer window
Browse to archive/pc/mods
Right-click into the command window to paste the path (or press Ctrl+V)
Hit Enter
The script will now process all of your .xl files, adding the necessary scopes. That was it!
Next, we'll process the .yaml files.
Go back to the command window from the previous section's step 1
Type or paste pip install pyyaml into command prompt and press enter.
It will confirm the install.
Type the following and press enter (you can autocomplete with the Tab key):
The script will now ask you for the path to your mods folder
Open The Cyberpunk 2077 Game Directory in a Windows Explorer window
Browse to r6/tweaks
Right-click into the command window to paste the path (or press Ctrl+V)
Hit Enter
Open your game and look for any broken pose packs.
If they don't work correctly in new Photomode even after using the scripts, it's likely there was an issue in the formatting of the original mod file.
You can check over the pose pack's yaml/xl for errors yourself (if you feel comfortable doing this), or ask the modder to revise it.
If you're a modder who makes pose packs, you can also use these scripts on your mod's packed folder (instead of your installed mods folder) to automate updating for patch 2.2 NPCs & ArchiveXL 1.19 Photomode NPVs.
If you already updated your mod for 2.2, you can run the scripts anyway, but they won't (shouldn't) do anything that isn't empty lines.
If your XL already includes the new photomode NPC entities, delete those entries and add the scope only.
If your file already has entries for the new photo mode poses, delete them
If you don't have any of those sections (because your poses are only for one body gender), you can skip that part of the process.
Find the line photo_mode.character.femalePoses: and change it:
Find the line photo_mode.character.malePoses: and change it:
If your file already has entries for the new photo mode poses, delete them
Now, add the photo mode poses for NPCs:
You're done! You can now use your pose pack with Photomode NPCs & AXL Photomode NPV.
Using Inverse Kinematics for easy posing
This guide will show you how to make use the IK template for making poses.
It has been originally published by xbaebsae and ported to the wiki with permission.
If you want to learn how to make poses, check Poses/Animations: make your own
If you want to familiarize yourself with Blender, check Blender: Getting Started
To learn about Inverse Kinematics, check Animations: IK and FK
xbaebsae's new simple IK Template (includes FemaleAverage/V, MaleAverage/V, MaleBig skeletons)
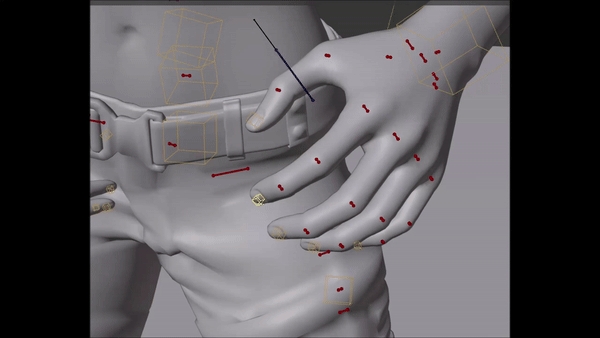
Select the yellow boxes (they're IK related bones) to move around bone chains. Use the grab in blender (shortcut g) to grab a bone and move it where you want it. This works on hands and feet which will move the respective arm and leg accordingly.
There are boxes in front of knees and behind elbows that are called TARGET_xyz. Grab and move these to adjust the angle of the joints.
The rig overall has constraints set as usual so elbows and knees will not bend unnaturally, saving you from broken LookAt features and generally just not realistic movement. No you cannot bend your elbow sidewards, sorry.
You can also use snapping to place for example hands, quickly. Place the 2Dcursor (the lil target thingy) by clicking for example on the hip of your character. Then select IK_HandRight and press shift+s>Selected to Cursor. The IK bone will snap to the cursor you placed!
!You cannot do this with regular bones!
Use IK_Hips to move the upper area of your character around as a whole, IK_ROOT to move the entire character and IK_SPINE to pose the first, lowest spine bone. The regular bone counterparts of these are not working correctly while IK is active. All other bones function as usual.
There's the bone IK_Pelvis which allows for easy hip shifting! No more fiddling around with the Hips bone for this! :)
Last but not least, the fingers also have IK chains for easy bending. You can still pose them normally as well and/or paste poses.
Pasting poses from non-IK rig will NOT work for the rest of the bones!
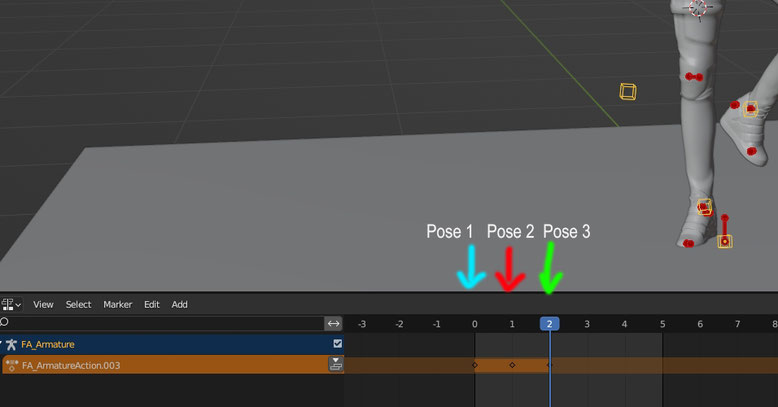
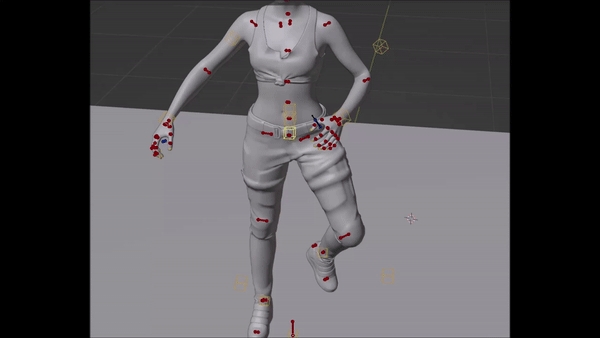
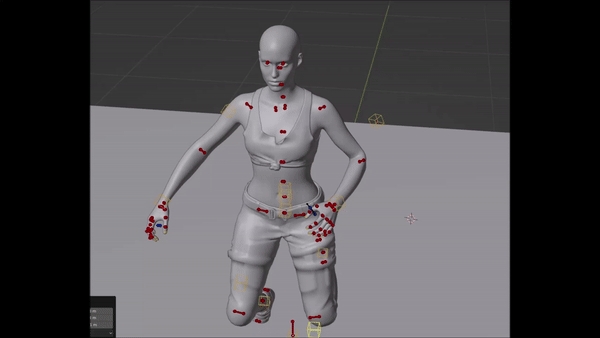
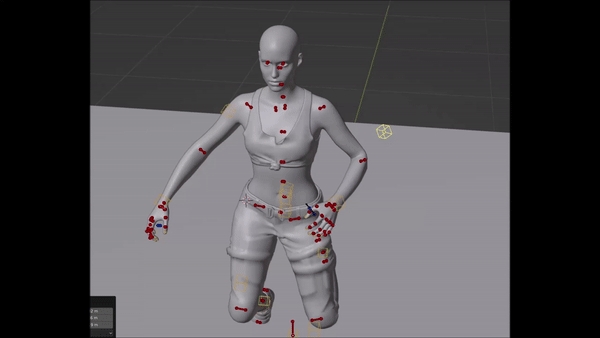
1. Instead of making a new action per pose immediately, create all your poses within a single Action. This simply means you do a pose, Insert the keyframe for it at frame 0, then move the timeline to frame 1 and do your next pose there, insert it, move to frame 2, pose, insert, repeat.
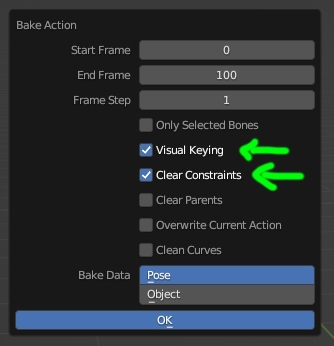
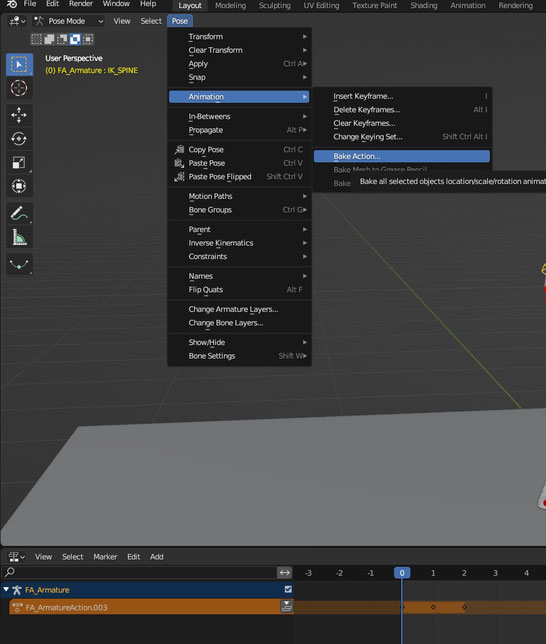
2. Instead of hitting the arrow to save the Action strip, Head to Pose>Animation>Bake Action.
In the window that pops up, use these settings. The green ones being particularly important!
This removes the IK from the rig, so do this only when you are done with all your poses! It converts the IK posed ...poses into regular keyframes ready for use ingame.
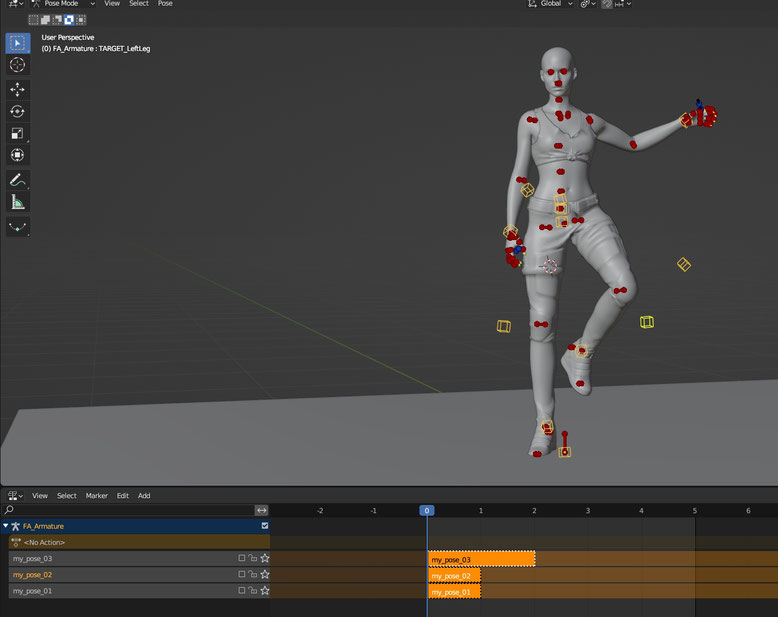
3. Now we just need to make seperate tracks for each of our poses. To do this, move the timeline cursor to Frame 0 where your first pose is and simply insert a new keyframe for the whole character again. Do a second one with the same pose (it shouldnt change anymore after you set the first one) to make sure everything will be okay ingame.
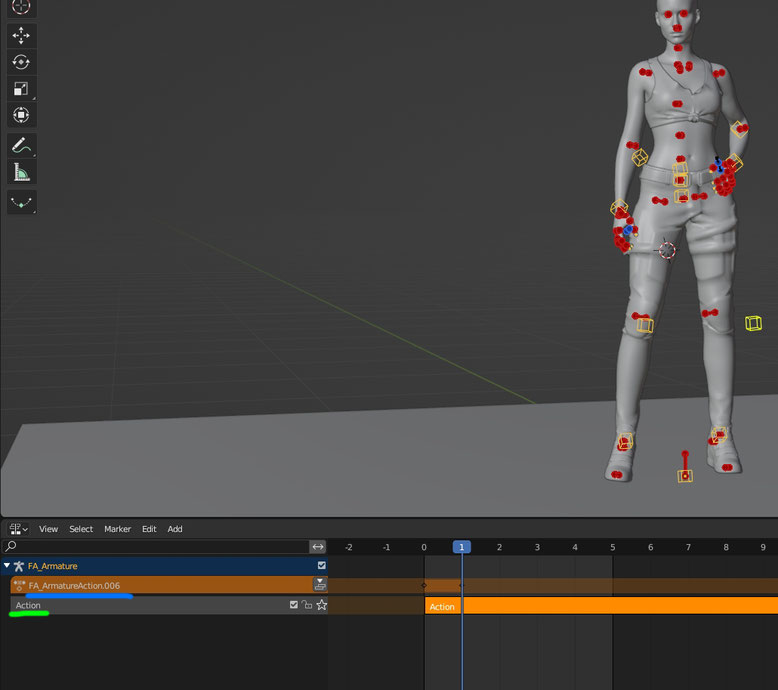
Green: The long Action we baked, has all poses on different frames. Blue: The new action for pose 1 only.
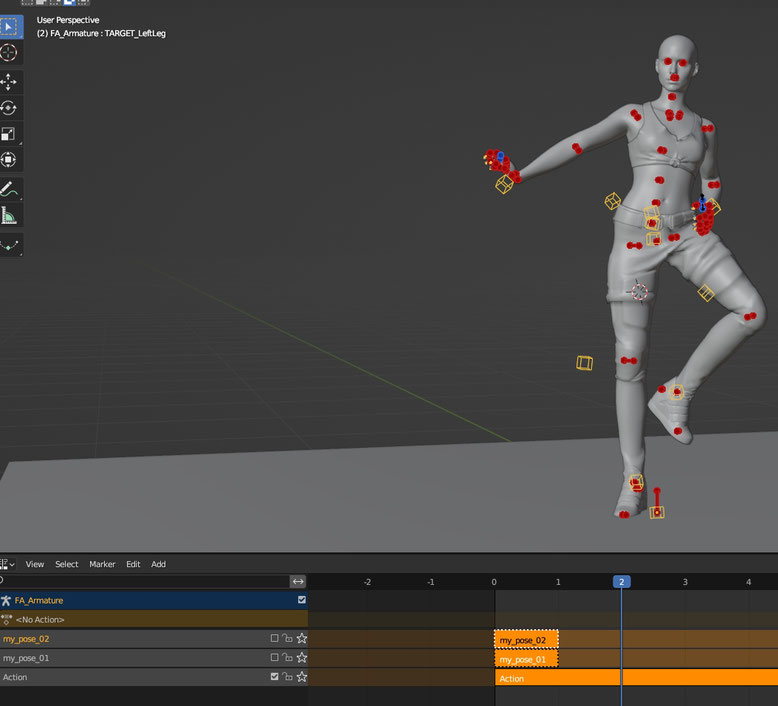
Click the little arrow as usual to make the current pose its own Action. Disable it and move to the next frame of your long Action. Repeat the same process for the second pose. Insert a keyframe where the pose is, then also insert one at frame 0.
Example:
Pose 2 starts at frame 1, inserted a second frame for frame 0 and moved it down as usual.
Pose 3 starts at frame 2 and i inserted a second frame at 0, then moved the action down.
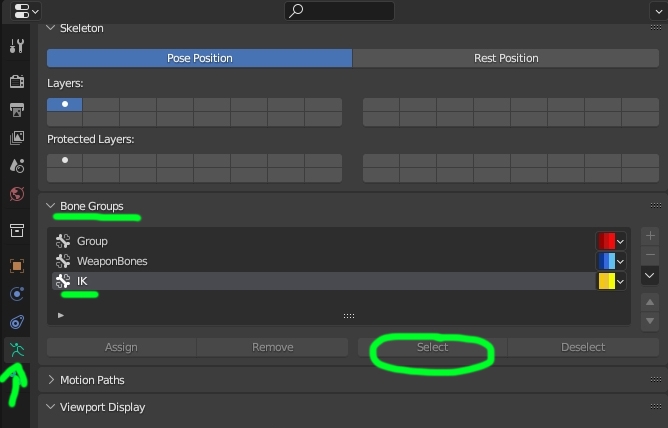
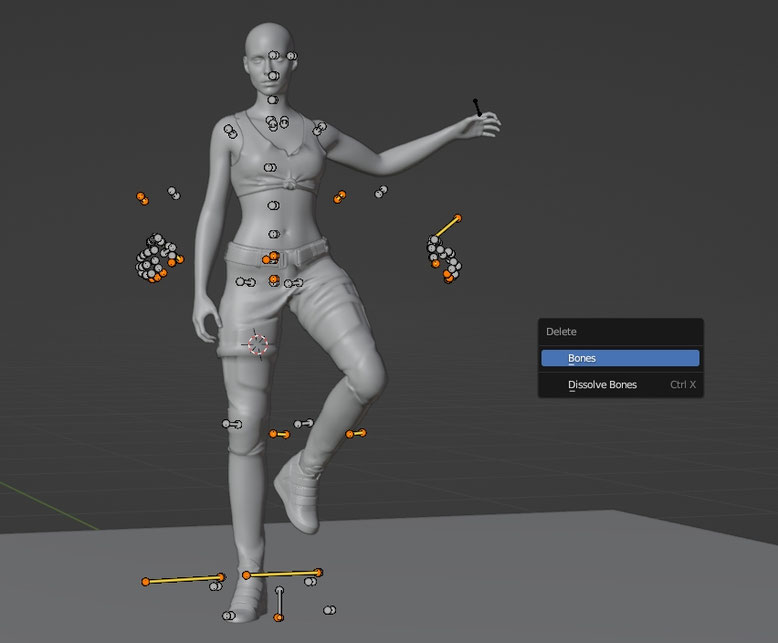
4. Before exporting, clean up the rig by deleting all IK related bones (they are now useless anyway). Head over to pose mode, select only the yellow bones by simply clicking this here:
Switch to edit mode and delete the selected bones.
Now you are done, your skeleton is cleaned to the old familiar one you used before.
The import process is the same as in Poses/Animations: make your own -> Exporting
Hope you found this useful! Happy modding~
This page describes how to remove Foot Snap IK from poses/animations in WolvenKit, such that feet don't snap / get glued to the floor in poses.
This tutorial was written by me after messing around until I got something to work the way I wanted to. But I only managed to arrive at this point thanks to the many other tutorials, and I actually have no background in animating/posing/using Blender at all. It is possible that some of the things I say are wrong / not the best solution / not perfect, but it did work for me.
Foot Snap IK (inverse kinematics) is a feature in the game that procedurally (at runtime) modifies poses to position feet on the floor. This can be good (e.g., making sure that both feet are on the ground when the character is standing on a slope or stairs), but can also be bad (makes it difficult/impossible to adjust the vertical positioning of your character in photomode, and glues feet to the floor when this is not intended for the pose). This tutorial covers how to disable this feature for individual poses in a .anims file in WolvenKit.
In this tutorial, I assume that you have a .anims file with some of your (photomode) poses in WolvenKit. This would probably contain some of your own new photomode poses that you have created/edited/imported in Blender, and then exported from Blender into WolvenKit, using a mix of the other tutorials.
If you know that you don't want any Foot Snap IK for any of your poses at all, the solution is simple: just start out by using the that also links to. However, sometimes we might have a single Photomode container with a mix of poses, of which we want some to use Foot Snap IK, and we want others not to. For this case, I'm assuming we start with a container that does include Foot Snap IK for all poses, and we'll try to remove it from some individual poses.
The following screenshot shows how you can see in WolvenKit whether or not your pose currently has Foot Snap IK enabled:
If you see this, and you want to get rid of Foot Snap IK for this pose, simply right-click the box with the red outline in the screenshot above, and select "Reset Object". See the screenshot below:
Make your own pose, then import it into photo mode
Published: September 2023 by Last Documented Update: June 19 2024 by LadyLea
This guide will teach you how to create a custom pose in Blender and import it into the game via Wolvenkit.
Since this guide is about creating and imported custom poses, we will make a photo mode replacer. To convert it to a standalone pose pack, follow the guide for either or .
If you have never done this before, don't do both at once. Or... do whatever, but it might result in unnecessary frustration.
For an overview of all poses in photo mode, check
For more general knowledge, check the section.
We all stand on the shoulders of giants: this process has first been documented by , who also provided the . You can find a link to their version of the guide in the menu on the left.
Thank you!
This guide will include the minimum amount of fluff and will link background information rather than giving it.
For that reason, you shouldn't skip or skim unless the section tells you that it's optional.
Any links in the text will either
provide additional information which you do not need to complete this guide
lead to step-by-step instructions for any given process
Follow them if you want to learn more, or if you are unclear on how to complete the current step, then come back here.
You will need the following software (install at least this version or higher):
To import your pose into Cyberpunk, you need a Wolvenkit project.
You can not move these .glb files. Wolvenkit needs them to stay where they are so it can splice your new animation into the existing .anims file.
Download the animation template(s) for your rig(s):
Move/copy them somewhere, then open the one you want in Blender.
This step will happen in Blender.
If the written instructions aren't clear enough for you, check the screenshots below them.
Open up the file
Select the armature by clicking on one of the bones in the viewport (the red circle on the screenshot below). They will be highlighted if you did it right.
Switch the viewport to Pose Mode in the dropdown menu at the topleft of the viewport, immediately below the "File" and "Edit" menus. This will turn the armature red.
Now, you need to create your pose. Before you do that, check the box below:
As of today (September 2023), we can only create poses and animations by adjusting each bone by hand. This is how:
Select a bone by clicking on it (it will appear highlighted)
Rotate the bone by either
pressing R to enter rotation mode, then moving the mouse to rotate the bone (read up on axis limitation in the expandable box above)
or
selecting the Rotate tool from the toolbar on the left, then clicking and dragging along the coloured axes
When you're done with this bone, position the next one.
You now need to create an animation that Wolvenkit can add into the existing file. For that purpose, we will create a nonlinear animation in Blender.
In the panel at the bottom, click on <No Action> to select it.
In the Armature -> Animation Data panel, click on the New button.
Now, we need to add keyframes, one for the fallback position and one for the pose.
Make sure that the keyframe selected in the animation timeline is 0 (see "Animation Timeline" screenshot below)
Click into the main viewport next to the armature
Open the Keyframe menu (Pose -> Animation -> Insert Keyframe, Hotkey: I)
Select Whole Character (Hotkey: W). The menu will close now.
Press the right arrow to select the next keyframe
Repeat the steps 3 and 4
After you have done that, click on the Push Down Action button
This step is crucial. If you don't do this, then Wolvenkit won't import your animation.
The names must be the same, and they must match the name in your .anim file.
Go back and read the warning box under step 4.
Double-check the names. (Yes, this is that important)
Optional: To add another pose, you can go back to Step 1, then rinse and repeat.
Now that you're sure that you have the correct names, switch the viewport back to Object Mode (the same way you switched to pose mode). Your armature should still be selected. TODO: This step will be made optional when the Blender plugin update hits. Update guide when it does.
This will open a file picker. Do the following things:
Check the Animations box on the right
When you're done, hit "Export for Cyberpunk".
Now it's time to import the file back into Wolvenkit.
Click on photomode__female__idle.glb to select it and open the import settings panel.
In the panel on the right, change Target File Format to Anims:
Hit the Import Selected button.
Youc an now test your mod: Install your Wolvenkit project by clicking the green button on the taskbar, and launch the game.
If all went well, entering photo mode will show your new pose.
Open your .anims file in Wolvenkit
expand the animations array at the top of the file
For each animAnimSetEntry, change the property animation -> animBuffer -> numTracks to 2
If that doesn't work, change the numTracks to 0
If Wolvenkit's console tells you something like this:
Import the .glb file into Wolvenkit again.
If you're really 100% sure, then you might have a broken NLA strip. That happens sometimes — simply recreate it:
If your armature isn't selected anymore, click on it to select it
Switch into Pose Mode
Press A to select all bones
Press Ctrl+C to copy their positions
create a new copy of the .blend file you downloaded (but keep yours open)
When trying to import into Wolvenkit, you get an error message like this:
That is because there is ancient data in the template, which Wolvenkit doesn't know how to handle. Delete everything called "Noesis" from the list of animations below:
I noticed Photo Mode V is huge, and sometimes, specific pose packs have different character scaling. For example, the MascV in is smaller than the MascV in my and pose packs. With the enabling of Holopointz, I was able to figure out why this occurs and how to “adjust” the scaling.
This guide is mainly a supplement to xBaebsae’s tutorials and resources. This guide allows you to scale armatures as desired for your VP, personal, etc., needs when you make pose packs and/or animations. This is TPP only.
NOTE: Retargeting poses and/or animations will adjust the scale. So a retargeted Fem V pose will make the Masc V pose a bit smaller and vice versa.
If anyone figures out a more efficient way to do this, please do not hesitate to contact me and improve on this knowledge.
Open up your template of choice. There is also a multiple armature template if you want to make shippy or choomy poses, and I will use it for this tutorial.
Select your desired armature and go into Object Mode. The armature bones should turn orange.
IF YOU NEED TO RESET THE SCALE, HIT ALT + S!
Go to the right-hand side of the screen while your armature of choice is selected, and go into the Items tab. It should look like this.
There are several ways to do this. Please remember that X moves side-to-side and will make the armature wide or narrow, Y moves front-to-back, and Z moves up or down, making the armature taller or shorter. You can do this via the Dimensions tab, but you can also adjust as needed in the Scale tab. I think the Scale tab gives better results.
Let’s say we want to make FemV taller than MascV at around the same “height” as Man Big. I put in some values below.
Now that you have your scale to your preference, you need to apply it. Hit Ctrl + A and select scale, or your changes will not be applied! Your armature will remain the default size when you import!
After you hit Ctrl + A and apply the scale, the armature will change appropriately. Ta-da! Import your pose, and this is what you will see in-game.
If you look closely, the armature has changed proportions from when the scale was applied.
If you did not get your desired result or created a curse, hit CTRL + Z and keep adjusting the values, and apply as needed. This may need to take some trial and error. :)
Please remember, you NEED to CTRL + S + Scale!
Have fun! I hope this inspires a lot of awesome poses, especially shippy ones. You also have the power to create some hysterical curses, as seen below.
xBae for pose templates.
Holopointz, for enabling me to screw around.
Manavortex, for being patient with my skill issues adding to the wiki.
Created & Published: Summer 2021 by @Pinkydude
As with AMM 2.0, this guide is rather obsolete, but will be kept archived!
What you’ll need :
The WolvenKIT console (CP77Tools)
I’ll assume you already know some basic modding (extracting the files with the console or WKit etc)
It’s important to also know that some characters have their own locomotion files (meaning unique pathing etc) Like Panam, Goro etc
I won’t go over every single ones here!
For this tutorial, I’ll make an animation for Mitch, who uses the Man Average Civilian Locomotion (MAC)
The MAC locomotion [man_average_civilian_locomotion.anims] is located here [base\animations\npc\generic_characters\male_average\locomotion]
This will be the path of your mod!
To grab an animation, you’ll have to go into the Animations folder, there you’ll see multiple other folders- the [main_quests] and [side_quests] have unique animations not used by any other characters outside of that that specific quest!
For example, q103 is Ghost Town, the start of Panam’s quest line
I’ll use the animation of Mitch hugging Panam when we meet them at the camp!
Once you find the animation you wish to use, simply copy and paste it in your last folder in your mod project, the [locomotion] folder, and rename the .anims file with the character’s locomotion file’s name, in Mitch’s case its [man_average_civilian_locomotion]
Once pasted and renamed, you can now open the .anims file in 010!
A lot of .anims file actually have multiple animation inside of it to choose from, simply open the [struct DATA] handle to expand the list. Since mine is an unique animation, there’s only one [animAnimation]
I’ll now click on the [CNAMES] handle and use the PASTE script
(I recommend setting a shortkey, you’ll use it a lot for custom poses among other things!)
A window should pop up asking for an input : Here, type [idle_stand]
(this is the name of the idle animation the NPCs use when spawned!)
This will add a new CNAME to the list. Now, go back into [struct DATA] and open up the [animAnimation] you wish to grab!
The new CNAME we added will automatically be the last one in the list, not wasting time by checking what number it has, I simply put a really large number to be sure to grab the last name in the list!
Click on the OG name and simply put 500 with the numpad to change the CNAME to [idle_stand]
Save your file and pack your mod! You’re done!
Load a save file, spawn any character using the MAC locomotion and VOILA 💛
Learn how to play an animation on an entity through clever gimmicks in Redscript.
This is an advanced tutorial that requires you to understand the basics of wolvenkit
First of all, let's give credits to people out there:
and authors donk7413 and Eli, who originally found out how to play animation through workspots. All credits to them in that regard.
psiberx for his numerous hints and advices, as always.
It started from a talk with @Eli and @donk7413 the authors of and mods.
When asked details about how they managed to have V smokes a cigarette anywhere in-game, they mentioned having merged all .workspot files in a gigantic file for convenience (namely ), so that Cyberscript can play any animation in-game on V or any NPC.
At first it didn't ring a bell, but then @psiberx mentioned about modders "abusing" .workspot by spawning an invisible .ent to have the target being animated.
The trick is actually to spawn an invisible device (.ent) right onto your entity, which then allows to trigger animation(s).
So it happens that we need a .ent file whose components contains a workWorkspotResourceComponent which references a .workspot by name and DepotPath.
In turn, .workspot file contains a list of worksSequences containing workAnimClip which are the animations to play with idleName and animName.
Of course the .ent must be made invisible and contain a set of specific properties, and this is where all hard work was already made by Cyberscript people.
On the other hand, if like me you only want to play 1 or 2 animations at most, then it's probably a lot of overhead and you can keep reading.
What I personally did was to reuse Cyberscript archive .ent stripped of components that I don't need, and .workspot with only the animations that I'm interested into.
You can then use wolvenkit and your file explorer to move the workspot_anim.ent in the location of your choice inside your mod. Then you can strip it of every components that isn't aworkWorkspotResourceComponent using wolvenkit.
Then you will need to locate an interesting .workspot file inside the base/workspot of the game and place it in the location of your choice inside the archive folder of the mod you are creating.
Redscript
Once the previous files are ready, we need something able to spawn an entity in Redscript (once again if your preference goes to Lua, I'd recommend you to use Cyberscript directly).
Here's a short example which will get us going:
(You will need to replace the paths to the .ent and .workspot files with the paths to your files )
to add this script to your mod, you will need to create the following structure in the ressources folder of your mod:
.ent can be anything, not just a "living entity". it can be a cigarette, the act of smoking.. it can really be "whatever".
it contains components with e.g. workspotMapper, entSlot, etc
it also contains obviously a workWorkspotResourceComponent with points out to the .workspot.
.workspot gets triggered throughout .ent: you don't spawn a workspot and play it on a target, you spawn an entity which references the workspot and plays the workspot through the entity (which in turn play the animation(s), and you can "jump" from one animation to another in the same workspot).
How to add your poses to AMM
Created by @manavortex Published April 16 2023
This guide will teach you how to add custom animations to AppearanceMenuMod's Pose tab.
Difficulty level: You're able to read ;) You don't even need to know your way around Wolvenkit for this one!
To add poses to photo mode, check .
This tutorial will use animation and pose interchangeably. An animation is simply a pose that moves.
You have an .anims file, either a game file or one that you have
You have a
You have a text editor like
You have one of the following things:
The Easy AMM Poses tool ( | )
The template project ()
Not recommended: A different template project or game files that you want to adjust. If you don't know what you're doing yet, this may lead to frustration
The screenshots show the example project, but it's absolutely no problem if you set up everything on your own: the guide will tell you which path goes where.
If you have downloaded the example Wolvenkit project, you can start it (the "Install" button has an "Install and launch" option in the dropdown) to see everything in action:
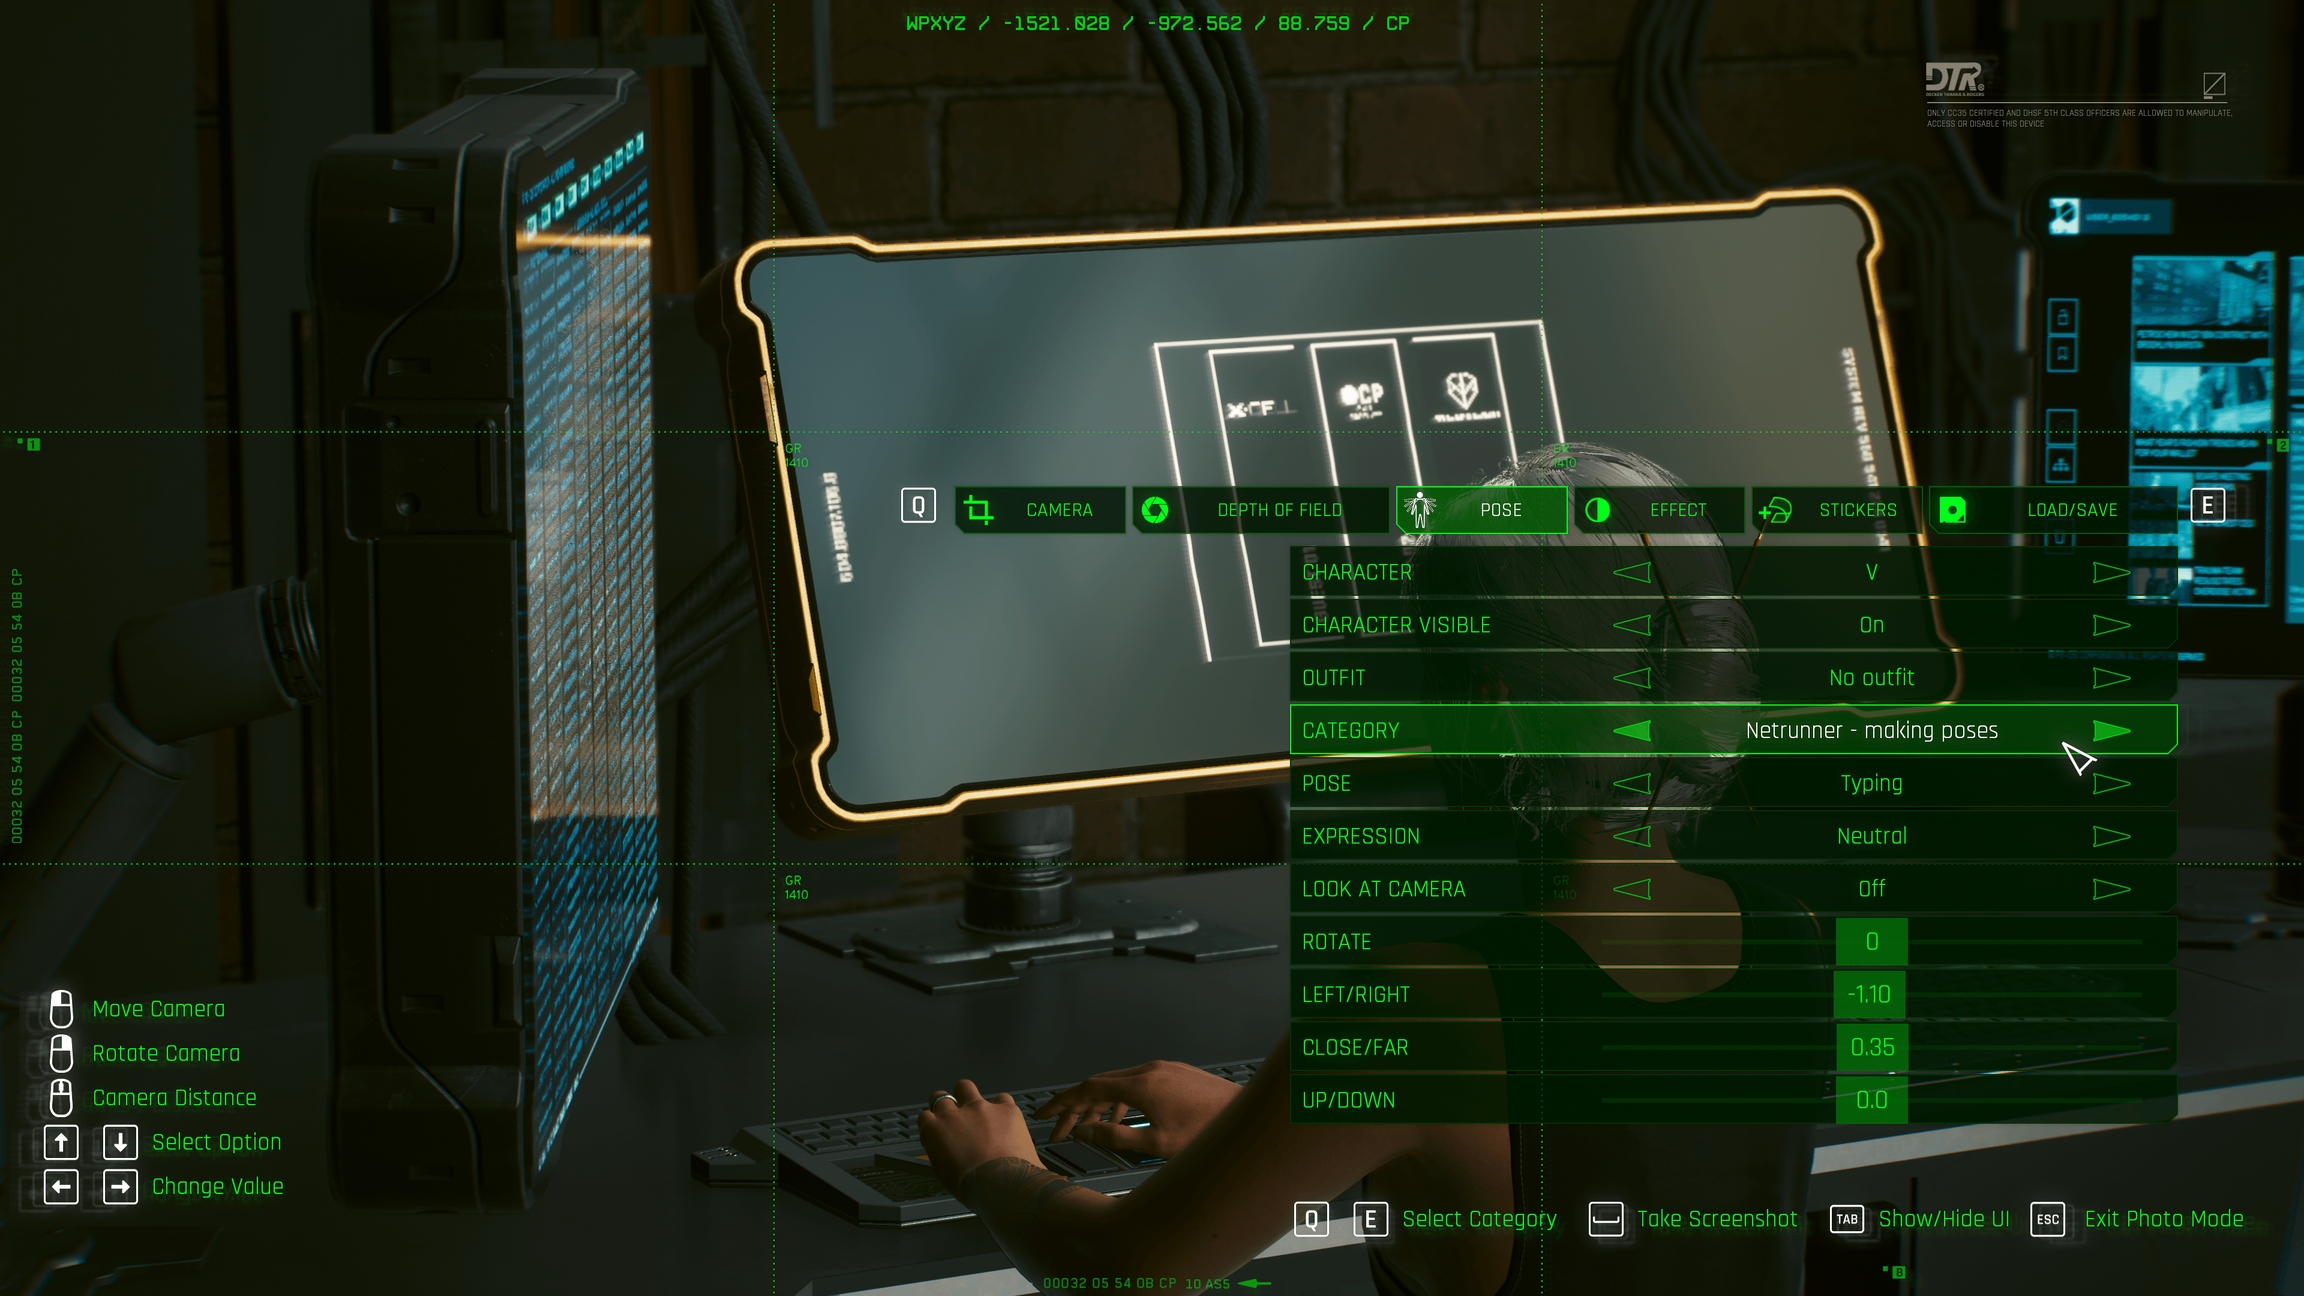
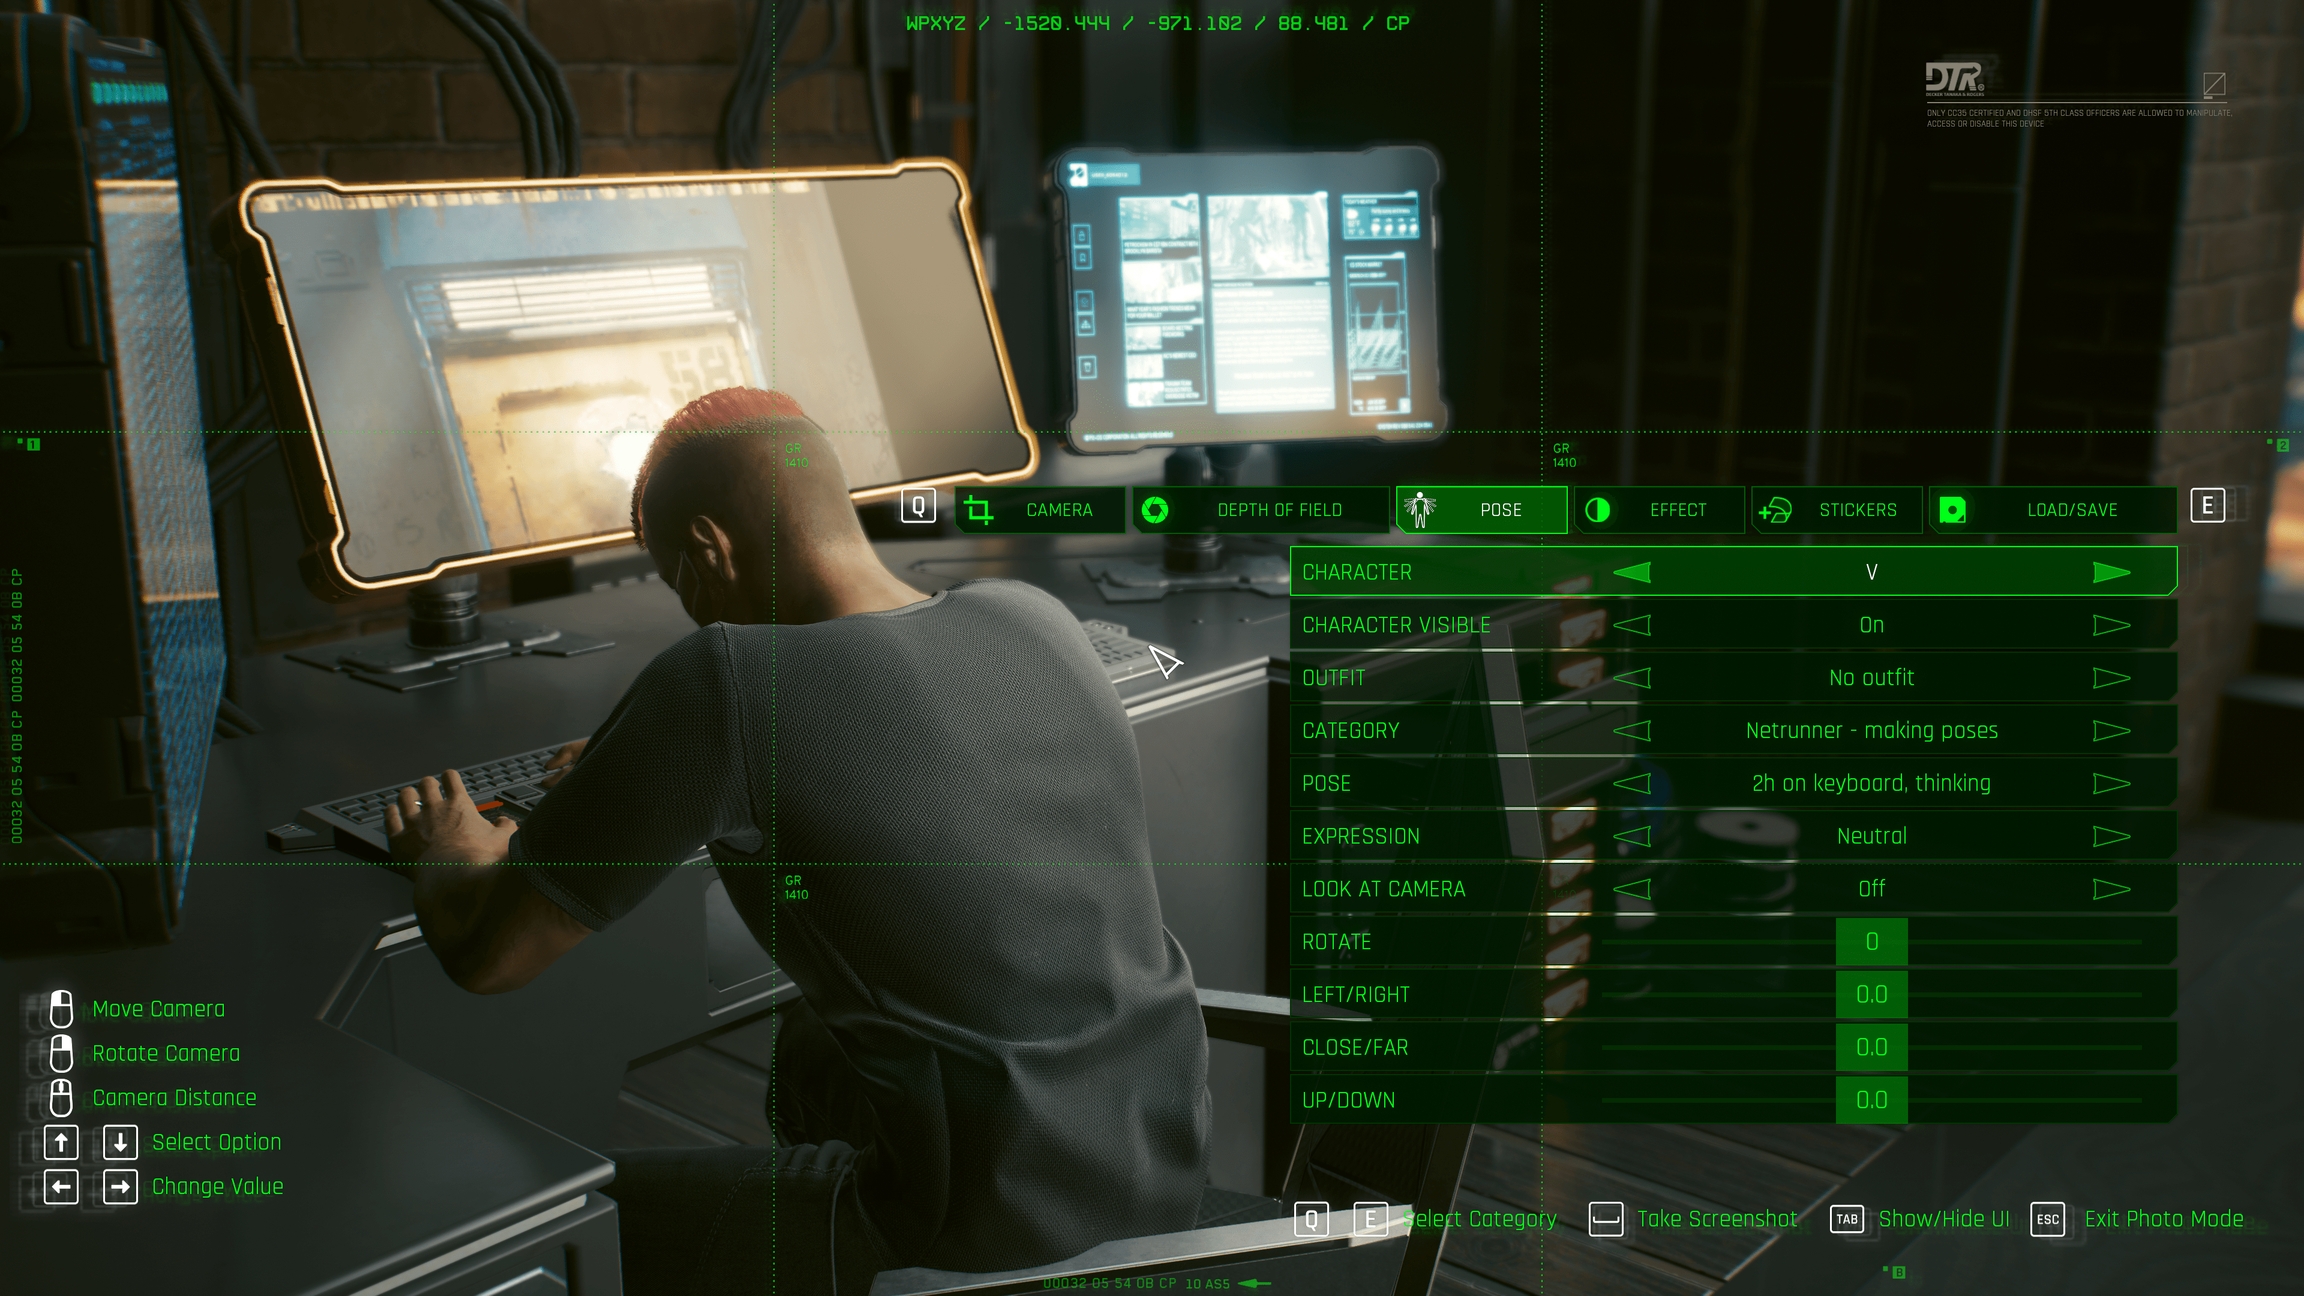
- Spawn an NPC (generic male or female)
- Switch to the Poses tab
- Find the Netrunner making AMM mods category and select one of the poses
- Your NPC should now move!
Visual learners rejoice: There is a video!
Start by customizing your file structure. If you leave it as it is and publish the mod and somebody else does the same, only one of the two will work. Create a folder structure that is unique to you.
It is good practice to leave base for the game files, and simply have a folder with your username at the root level of archive.
Your file structure must not contain spaces, capital letters, or any funky characters, or the game might not find your files. Stick to a-z, 0-9, - and _, and you're safe.
Any lua poses for AMM must be inside Custom Poses, but you can rename your_optional_subfolder to whatever you want (or even delete it).
Rename amm_tutorial.lua to something that identifies your pose pack, e.g. netrunner_coding
Open the file in your text editor. Let's look at the first half of the entries (we'll check the second half later):
Change modder to your name so people know who made this.
Change category to the name of your pose pack. This will be used for AMM to sort your poses into categories, which people will use to browse, so don't go overboard.
Change entity_path: Right-click on your .ent file in WKit and select Copy relative Path and paste it into the lua.
Replace all \ in your entity path with \\. This is critical and your mod will not work if you don't!
Do not change anything else — we're done here.
Scroll to the bottom of the file and find the node named workspotTree. Open it and find the list finalAnimsets.
Each of the workWorkspotAnimsetEntries inside finalAnimset connects animation files and rigs.
You can delete entries if you don't have animations for that rig.
The tutorial version uses the same .anim file for V's first person animations. Looks weird, but works. You can change it later on your own.
For each of the entries you keep, make sure that the following paths point at the right animset:
animations.cinematics[0].animSet
loadingHandles[0]
If you have launched the game before, make sure to delete the file
Cyberpunk 2077\bin\x64\plugins\cyber_engine_tweaks\mods\AppearanceMenuMod\Collabs\Custom Poses\your_optional_subfolder\amm_tutorial.lua
Now that we have the basic structure covered, let's talk about pose names. This time, we start at the end and make our way backwards.
Files for each type of rig are included in the example files, but you can also find them yourself by searching Wolvenkit for rigName > .anims or character > .anims (e.g. massive > .anims or Smasher > .anims)
Find and open your .anims file. Here's what you're looking at:
Open the animations array to see data for all defined animations (poses). You can make more by duplicating them, delete obsolete entries and change their names; any other changes are coming from Blender.
An animation's name must match the .lua and the .workspot, spelling mistakes will break it. They must not contain spaces, use _ instead. AMM will take care of that for you.
Open your .workspot file and expand the following nodes:
workspotTree
rootEntry
list
First, we're going to look at workSequences.This data type is used for pose transitions and -definitions (e.g. an NPC standing up). For our purpose, we don't need any of the fancy stuff.
While this list in the example file contains two workSequences, you're gonna need one per however many animations/poses you have. Duplicate to your hearts content.
You need one workSequence for each of your animations!
Open the workSequence and expand both id and list.
Expand the first list entry (workAnimClip) and its proprety id.
Point it at the right animation: Change the workAnimClip's property animName to the name of your animation (green on screenshot)
Make sure the IDs in the workSequence are unique. (You can skip this for the two entries from the template - if you continue they pattern they establish, all id's will be incremented and unique.)
Find the workSequence's property id and increment its numeric value +1 from the previous id (orange on screenshot)
Find the workAnimClip's property id and increment its numeric value +1 from the previous id (orange on screenshot)
Optional, but recommended: Set the workSequence's property idleAnim to the name of your appearance (purple on screenshot). This is purely for your convenience, as you can see which is which when scrolling through the list.
The numeric values for all theid properties - under workSequence and workAnimClip - need to be unique within the scope of the workspotTree. As soon as you have duplications here, things will be out of order.
As of version 2.2, AMM doesn't know anything about the file structure. For that reason, you need to tell it about the poses you added, and the anims array is how you do that.
If you have launched the project in its default state before starting to customize it, delete the file
Cyberpunk 2077\bin\x64\plugins\cyber_engine_tweaks\mods\AppearanceMenuMod\Collabs\Custom Poses\your_optional_subfolder\amm_tutorial.lua
A pose gets correctly added by AMM if you see it in the list and can delete it.
The problem is in your .lua, AMM fails to pick up the pose information you provided. You can check AppearanceMenuMod.log, which might tell you what's wrong, but it's probably fastest to just start over from the template .lua file.
Make sure that you don't add or delete any commas or quotation marks.
The problem is between your .lua and your .ent file: the poses were registered correctly with AMM, but Cyberpunk can find nothing to spawn.
The error is between Blender and your .anims file. Double-check names and make sure that you actually imported.
Copy the folder path. If you need help, check
Copy the folder path. If you need help, check
Now, go to ArchiveXL: adding Photo Mode Poses -> , and follow the steps there.
IMPORTANT: after doing this, the pose would in my case sometimes completely break, causing the character to explode into a huge graphical glitch of floating triangles in-game. The solution that worked for me was to, after going through the process above, simply re-import the .glb file from Blender into WolvenKit again (exactly the same file that you have already imported once), as per the other tutorials such as .
. Give it a name that you can identify later.
Now, your project needs the photo mode .anims file appropriate for your pose(s). The table below shows your options. for the correct photo mode file and add it to your project:
Export the file(s) to GLB via . Default settings are fine. (We will overwrite these glb(s) with our new pose, then use Wolvenkit to merge them into the existing .anims file.)
for : from Angy's Google Drive or check
for : Zwei's edit of Angy's templates
Now, , then proceed to the next section.
Now, rename both your NLA strip and your animation to idle_stand_01. This will overwrite the "Tabula Rasa" animation. (Find a list of animations and their associated names .)
If you aren't planning on replacing the in-game idle poses (i,e., Tabula Rasa), it is still required that your NLA strip and your animation have the same name.
Use the Wolvenkit Blender Plugin to as a .glb file. If the instructions below don't match, check -> for the up-to-date workflow.
Navigate the to the path of the file you exported in the and click on it to overwrite it
Switch back to Wolvenkit and open the .
If that still doesn't work, make sure that your pose has at least two keyframes by going back to and not skimming this time.
To make sure that the .glb file that you want to import into is okay, do a fresh of your .anim with a Wolvenkit version from after February 10 2024 (>8.13 should be ok)
Use the Wolvenkit Blender IO suite or greater to . If the error does not go away, update the plugin.
I have no idea how to tell you this, choomba, other than stressing thrice that it's important and putting a big red box, but the NLA strip and the animation must have the same name. Go back to "" and double-check. The animation might have trailing numbers, e.g. be called photomode__female__idle.001, that will already do it.
Create a new NLA strip by repeating — but instead of posing the armature, you can simply press Ctrl+V to paste the bone positions from your previous animation.
Export the new NLA strip, then . This should work now.
We're reaching the end of the rope here. Go back and . If that wasn't it,
In your old Blend file, repeat 1-4 of the
In your new Blend file, repeat 5+6 of the
(or any other mods that spawn characters)
or the game files extracted [basegame_4_animation.archive]
The 010 hex editing software with the CP77 template as well as the scripts
Generally speaking if you need to play a ton of animations I would recommend you to use Cyberscript directly, since it already does everything for you and also comes up with a ton of useful more features to build a mod with ease.
To do the same, you will need to download the , install it in your mod folder so that Wolvenkit can find it, and locate the workspot_anim.ent file in the following directory structure:
This is exactly what offers with DynamicEntitySystem: see !
Instead of following the process below, you can use the generator, which will walk you through the process.
The pose generator will generate the entire structure out of your .anim file and your user input. You can then follow the steps under to move your files around.
Entity files tell the game what to load. You can learn more about them if you are curious, but you don't have to.
Open the components array, find the component with the name of amm_workspot_collab, and set the depotPath of workspotResource to the relative path of your file.
You don't need to change anything here yet, we'll be doing this .
An .anims file is targeting a specific rig and holds a list of animations. These hold the pose data; they're what you overwrite when .
A good time to check: make sure that everything works again and that the files are correctly connected. If not, check the of this guide.
To clarify - our first example workSequence had a property id of 2 and its workAnimClip's propery id was 3. Our second example workSequence had a property id of 4 and its workAnimClip had a property id of 5. Therefore, your next workSequence should have a property id of 6 and its workAnimClip's property id should be 7, and so on. But good news! WolvenKit's File Validation can fill in these numbers for you. Visit for more information.
The lists tell AMM which poses belong to which rig, allowing to hide them when they aren't supported. As you can see, it's no problem if there are duplicate names, and you can even reuse entries in the workspotTree — the game knows which animation to use because of the .
Check your for copy-paste mistakes when hooking up your .anim files.
You messed up the indices in the .workspot file. and make sure that they're all unique.
>= 8.13
>= 4.0
>= 1.5.3
female
base\animations\ui\photomode\photomode__female__idle.anims
male
base\animations\ui\photomode\photomode__male__idle.anims
Wolvenkit
>= 8.9.0 (or whatever works for you)
AppearanceMenuMod
>= 2.2 (earlier versions won't support this)
How to hook up custom photo mode poses with ArchiveXL
Published: May 09 2023 by @manavortex Last documented update: December 17 2024 by @manavortex
This guide will walk you through adding poses to Cyberpunk 2077's photo mode with ArchiveXL.
Difficulty: You know how to read ;)
Easy Photomode Poses by wolv will do all this automatically and is up-to-date with 2.2! You can skip a bunch of reading and just use the required tool
To make poses from scratch, check Poses/Animations: make your own
To scale poses/animations, check Scaling Poses/Animations
We will hook up an existing .anims file to photo mode. If you don't have one, you can find a dummy file in the AMM pose guide.
Tool versions:
Cyberpunk 2077 2.2
WolvenKit >= 8.15.0
Notepad++ (you can use any text editor, but N++ is recommended)
Your finished pose mod will have the following dependencies:
Download either of these files:
This tutorial assumes that your Wolvenkit project is called your_cool_new_pose_pack, and that your legal name is your_beautiful_name.
If that's not the case, please adjust accordingly!
At any point during this guide, you can press the green Install button on Wolvenkit's toolbar to check the mod in Wolvenkit.
Use Wolvenkit's Rename feature with the Update in project files box checked
Use Notepad++ to edit photomode_poses_tutorial.xl. Search&replace the original path (tutorial\animations\netrunner_making_poses) with your new folder path.
Test. The. Mod.
Proceed to Step 2: hook up your poses
We usually do this at the very end and I'm leaving you alone with it. However, this time we start by renaming the folders.
Here's how your project should look when you're done.
Select the highlighted tutorial folder and press f2. This will open the rename dialogue.
Change its name, and check the Update in project files? box
Do the same for the netrunner_making_poses folder (you want your file structure to be as tidy as it can be - future you will thank you for it)
Switch your project browser to the resources tab and open photomode_poses_tutorial.xl in notepad++:
Use Edit -> Replace (Keyboard shortcut: Ctrl+H) to open the search and replace menu. Replace the old path with your new path:
tutorial\animations\netrunner_making_poses -> your_beautiful_name\animations\your_cool_new_pose_pack
Hit "Replace All"
Save your file (Keyboard shortcut: Ctrl+S)
Now, rename the files under resources as well:
photomode_poses_tutorial.xl -> your_cool_new_pose_pack.xl
r6\tweaks\tutorial\photomode_poses_tutorial.yaml -> r6\tweaks\tutorial\your_cool_new_pose_pack.yaml
Rename r6\tweaks\tutorial to r6\tweaks\your_beautiful_name
That's it for the renaming. Time to test!
Install the mod, and make sure that you still have photo mode poses.
This file tells Cyberpunk to load your custom poses and will be in the same folder as the .archive file for your mod. It looks like this:
You have to adjust the paths under set and en-us to your new changed folder structure.
If you want to support more body types from the Nibbles Replacer, you can switch to the Mod Browser and enter the following search query to find all the entities:
base\characters\entities\photomode_replacer > .ent
Here's what those things do:
animations: A list of entities and animation files that you want to add to them
animations/entity: The relative path to the photomode .ent file. There are just three of them.
animations/set: The relative path to the .anims file in your Wolvenkit project.
localization/onscreens/en-us: A file with translation strings. Holds the name of your photo mode pose set.
You can name this file whatever you want, just make sure that you change the path and name in the .xl file.
Change the yellow box UI-Photomode-tutorial-netrunner-making-poses to something unique to your mod.
To do future you a favour, use names that will make sense even after a year or two - e.g. UI-Photomode-your_beautiful_name-my_cool_poses instead of UI-Photomode-ghuawstsedr-hsarht223445
The green text is the name that will show up in photo mode.
femaleVariant is the default key - if you don't need different pose names for the male body gender, leave it empty.
If you have created your own animations (as a replacer or for AMM), then you are already familiar with this kind of file. If not, it is time to appropriate one from the game files - pick any, since the process is just like with a replacer.
Just as a reminder, here's how they look:
You will need the green text in your .yaml file.
Optional: If you want your pose to move, you can set the duration in the .yaml as well!
Without this file (r6/tweaks/your_beautiful_name/your_cool_new_pose_pack.yaml), the animations will be in the entity, but the photo mode won't know about them.
You can use this tool by @wolv to autogenerate your .yaml. If you do that, then you can skip this entire section and check the result.
As of Dec 17 2024, the tool is not yet up-to-date with 2.2!
The yaml file has three sections:
The first block will introduce your new category to the photo mode.
I recommend doing search and replace on netrunner_making_poses, because it's used a bunch of times.
PhotoModePoseCategories.netrunner_making_poses: This is the name of the category, used to assign individual pose entries to your category.
displayName: This must match the secondaryKey in your .json
If one of your poses is called idle_stand, that will break a bunch of other mods. Please re-name it in both the .anims file and the .yaml before releasing.
Now comes a long list of entries. They'll look like this:
You need to add one of those for every pose from your .anim file that you want to show up in photo mode.
PhotoModePoses.sit_chair_table_keyboard__2h_on_keyboard__make_amm_addon: This is the unique key to assign your pose to your pose set. You'll need it in the third block.
animationName: This must match the animation name in your .anim file (the green box).
category: This must match the category in the first block.
displayName: What'll show up in photo mode
You register your poses for photo mode by creating the following entry categories. You can use yaml anchors to minimize copy-pasting:
Add both code blocks:
Characters with *AddPoses will use the poses defined under &AddPoses. If you don't want a character to use certain poses, don't put *AddPoses next to their photomode.character entry.
An entry without YAML anchors, where poses are manually appended to each character, looks like this:
The entries in the list must match the unique keys that you've defined in the second block, and you need one entry per pose.
If you have different names for differently-gendered poses, you need to use the correct lists.
Before you can share your pose pack, you need to change the paths. If you don't and the next modder also doesn't, then only one of your mods will work.
You can find a full guide on changing the paths here.
If you rename files or folders under resources, remember to delete the old control files from your game directory.
At any point during this guide, you can press the green Install button on Wolvenkit's toolbar to check the mod in Wolvenkit.
You can find a more detailed guide on this on xbae's website.
It is possible to have certain props spawned automatically. However, this feature works only for Player V.
In your .yaml file (r6/tweaks/your_beautiful_name/your_cool_new_pose_pack.yaml), add the acceptedWeaponConfig attribute.
In the case of weapons, V spawn with whatever weapon you were holding when entering PhotoMode, or the default weapon if none was defined.
The position of the prop is defined by WeaponRight/ WeaponLeft bone.
You can limit the availability of poses by setting a poseStateConfig. For example, the following entry in your yaml will cause the pose to be unavailable unless V is swimming forwards:
Once installed, it will be in the same folder as the .archive file for your mod — so you should name it your_mod_name.archive.xl
Your file should look like this:
While editing .xl files, make sure to keep the indent (the number of spaces at the beginning of the line). If you fuck up, you can use yamllint to check.
From the animations section, delete the blocks that you don't want
Replace tutorial\animations\netrunner_making_poses\pXa.anims with the relative path to your .anim file(s) as copied from Wolvenkit's project browser
Replace tutorial\animations\netrunner_making_poses\localization.json with the relative path to your .json file as copied from Wolvenkit's project browser
Optional: For compatibility with older game versions, copy the code under animations: (not the label itself) from the <= 2.1 page in the code box above and add it to your file.
Optional, but recommended: Run your .xl file through yamllint to check for syntax errors.
Save your file.
The .xl is now updated to support vanilla Photomode NPC and Photomode NPV!
Before finishing up, make sure to run your file through yamlLint and get rid of any errors.
If you rename files or folders under resources, remember to delete the old control files from your game directory!
Find a list of the potential entries under Cheat Sheet: Poses/Animations ->
Find a list of the potential entries under Cheat Sheet: Poses/Animations ->
