Switch to the "Shading" perspective and add an "Image Texture". Select your image by clicking the corresponding button:
The viewport should already be set to "Solid". Click on the dropdown arrow next to the options and select "Texture" from the list.
You will now get the selected texture directly as an overlay.
Step 1: The Displacement Map
As the first step, we create a Displacement Map for our 3d object. This black and white image will turn your mesh into an object with actual (simulated) depth, which we will then "bake" into a normal map.
This tutorial won't cover the process of how to draw such a map in-depth, but there will be a few tips how to do that in Blender.
The displacement image should be saved in 32 bit image depth rather than the usual 8. This will yield better results with the normal maps.
Texture Paint Mode
The Texture Paint perspective lets you draw directly on your mesh's surface:
You will probably want to fix this up in Photoshop (Photopea).
UV edit mode
To see how the mesh is projected on your image, you can check out the UV edit mode.
Switch to "Edit" (shortcut: Tab) and select all vertices (shortcut: ctrl+A). You will now see them projected on the texture:
Feel free to change the UV mapping. You can export this back into Cyberpunk!
Step 2: High Poly and Low Poly meshes
Once you are done with your displacement map and the UV mapping looks like you want it to, it's time for the next step: projecting!
Take your displacement map and create a slightly blurry version of it. This will prevent artifacts on the normal map, as the algorithm doesn't like perfectly straight edges.
I create a duplicate of my entire armature, just to make certain that I don't accidentally overwrite anything I want to keep. Only work on the new object, since we're getting destructive here.
Make sure that your viewport is in Object Mode
Select all objects that you want to go on the same normal map, then join them together (shortcut: Ctrl+J).
Create a duplicate of this mesh (Ctrl+D, ESC to stop moving), then rename that to "Low Poly".
Select the mesh you duplicated and rename it to "High Poly".
Open the "Modifiers" tab and assign the following modifiers after the armature modifier (check screenshot in Step 6)
Generate -> Subdivision SurfaceLevels Viewport: 2 or so
Render: As many as Blender lets you get away with without crashing, I used 7
Advanced:
UV Smooth: Keep Corners, Junctions
Boundary Smoothing: Keep Corners
Deform -> DisplaceCoordinates: UV
UV Map: UVMap
Direction: Normal
Strength: -0.002 (you can play around with this)
Midlevel: 0.000
For the "Displace" Modifier, create a new picture, then click on the two sliders to show this texture in the textures tab
Load your blurred texture:
If you hide your "Low Poly" mesh, the modifiers should now let you see creases on your high poly object! Exciting!!
The normal map will only care for relative depth, so keep the creases on your mesh shallow. If you make them too sharp, this can lead to artifacts on the baked normal map.
Step 3: Prepare the material
Switch to the "Shading" perspective again. Add another image texture and create an image with your target resolution. Call it "Bake" or whatever.
Remove the link to your material's normal input - otherwise, it'll bake your normal map into your normal map, and the results won't be pretty.
Step 4: Prepare the low poly mesh
The high poly mesh needs to be completely covered by the low poly one, like plastic wrap. If that isn't yet the case, you can inflate your low poly mesh:
Set the viewport to Object Mode
Select the Low Poly mesh
Switch into Edit Mode (tab)
Select all vertices (ctrl+A)
Fatten (Alt+S, adjust amount of fattening via mouse)
Fix up whatever parts didn't fatten correctly by hand.
If your mesh inflates asymmetrically
Undo your action and select all vertices again.
Put the 3d cursor in the center of the selected vertices:
Right-Click -> Snap Vertices -> Cursor To Selected
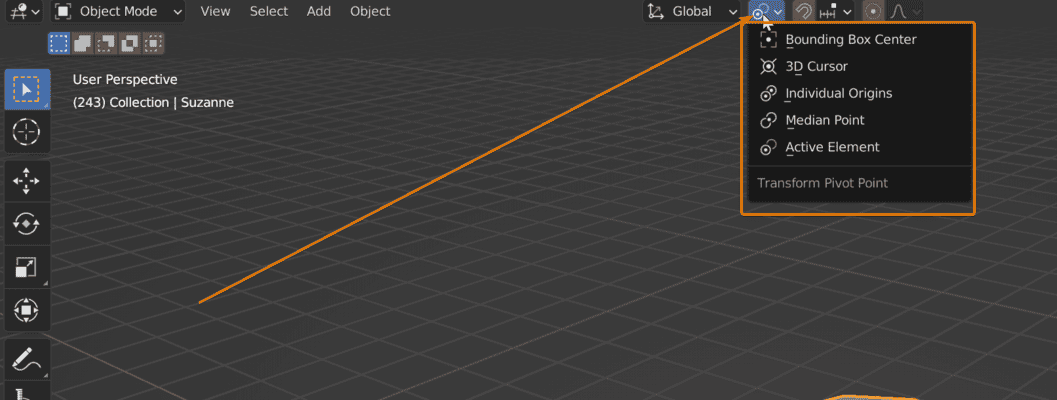
Set the Pivot Point to 3D cursor (Shortcut: . (dot), Numpad 6)
Set it to "3D Cursor"
Fatten again!
Step 5: Baking
In Blender, the "active" object is the "previously selected" one. Select your meshes in the following order:
Low Poly
2. High Poly
Find the "Render Properties" tab.
At the very top, set "Device" to "GPU Compute" (unless you'd rather bake on your CPU)
Scroll down all the way to "Bake". Configure it like this:
Bake Type: Normal
Influence / Space: Tangent
Selected to Active: Checked
Extrusion: 0.04 m
If your generated normal map shows artifacts, try tweaking this.
Max Ray Distance: 0.04 m
If your generated normal map shows artifacts, try tweaking this.
Output / Target: Image Textures
Clear Image: Checked
Margin / Size: 16px (or whatever suits you)
Save. Your. File.
Things are looking like this now? Great, then click "Bake"!
Baking takes time (several minutes) and most of your PC's free resources. This is normal.
If everything went well, the image editor on the bottom left will change and display your normal map.
A normal map with no artifacts or distortions: this is the kind of result we want.
You can export the image via the hamburger menu in the image editor (bottom left panel of the screenshot).
Troubleshooting
This troubleshooting section is for the baking process — the one for normal map textures is here.
First of all, make sure that all your normals are pointing the right way. In the viewport editor, click the "Show Overlays" button and select "Geometry -> Face Orientation" near the bottomn. Blue means outside, red means inside.
The baking process works by capturing the rays of light that bounce between the high poly mesh and the low poly mesh. If you have artifacts, then some of those rays bounced off something else first, which makes them register as inverted. That's the reason why steep creases are a problem — a ray of light might get caught in there and be flipped around.