Editing LUTs
Here we will go over one of the first steps to visual modding, editing LUTs!
Last updated
Here we will go over one of the first steps to visual modding, editing LUTs!
Last updated
The term LUT has its origins in mathematics, where a Look-Up Table would be able to shorten certain math operations by containing readily-calculated values for any input value, or an operation for an input value for a desired outcome. This shortcut was quite efficient and sped up many operations, and was normally designed as a matrix of different numbers and variables. Soon enough, this improvement in speed would be applied in many other fields, and eventually reached computer graphics and film production.
LUTs are essentially a texture or text file containing every single possible color that can be displayed, and the transformation of an input color into an output color through it.
There are many different types of color-grading-related LUTs, such as .CUBE
files and .3DL
files, but video games often use a texture.
Initially, Cyberpunk took an approach like many other games, and encoding the LUT as an unwrapped 3D texture:
Afterwards, Cyberpunk would repackage LUT textures with the blue and green channels inverted to get higher quality, as the human eye values green more than other colors and is more efficient to get all gradients laid on top of green instead of blue. Here we can safely assume is where the switch to using true 3D textures was also made, but we will not show a 3D texture due to redundancy and inability to do so, so just assume from now on all textures are actually just a 3D cube.
To get even more odd, Cyberpunk would then put the image tone mapping, the process in which HDR colors are processed into SDR, inside of the LUT! This came with the conversion from using a normal sRGB transform, which is industry standard, to using an input of ARRI LogC1 and outputting a linear color which is afterwards processed into normal sRGB gamma by the linear tonemapping.
With all that backstory done--how do we start?!
You'll need WolvenKit, NVIDIA Texture Tools Exporter + its Photoshop plugin, and we also require Adobe Photoshop CS4 or later. Photoshop CC is preferred.
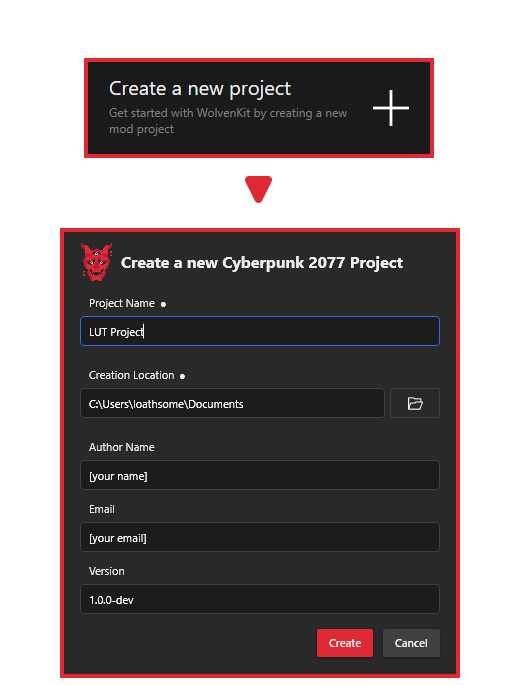
Create a new WolvenKit project and call it whatever you want.
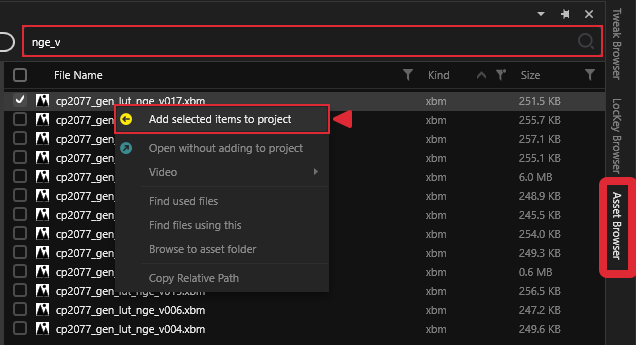
After that, import the file base\weather\24h_basic\luts\cp2077_gen_lut_nge_v017.xbm
into your project.
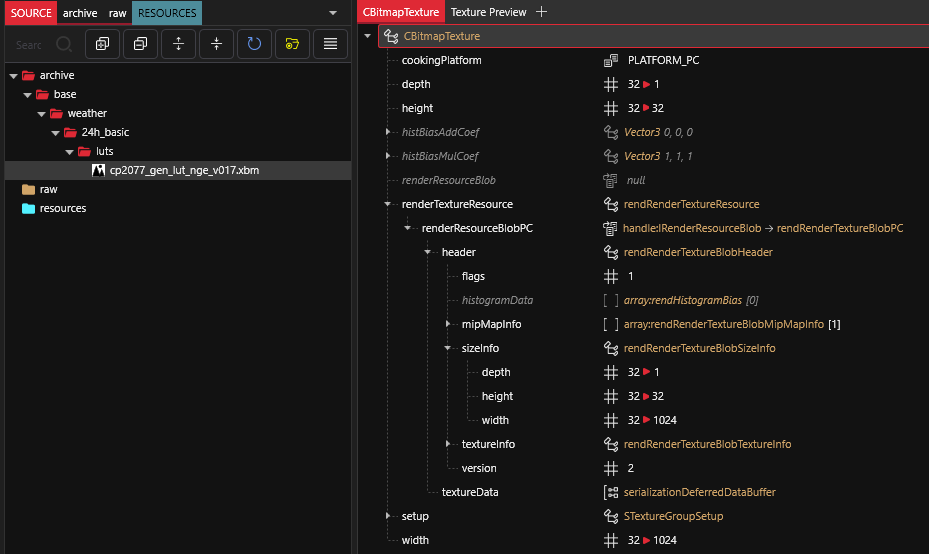
Then open it, and change depth
to 1
, height
to 32
, and width
to 1024
. After that, navigate to renderTextureResource/renderResourceBlobPC/header/sizeInfo
and apply the same edits as before.
Export the file into a DDS...
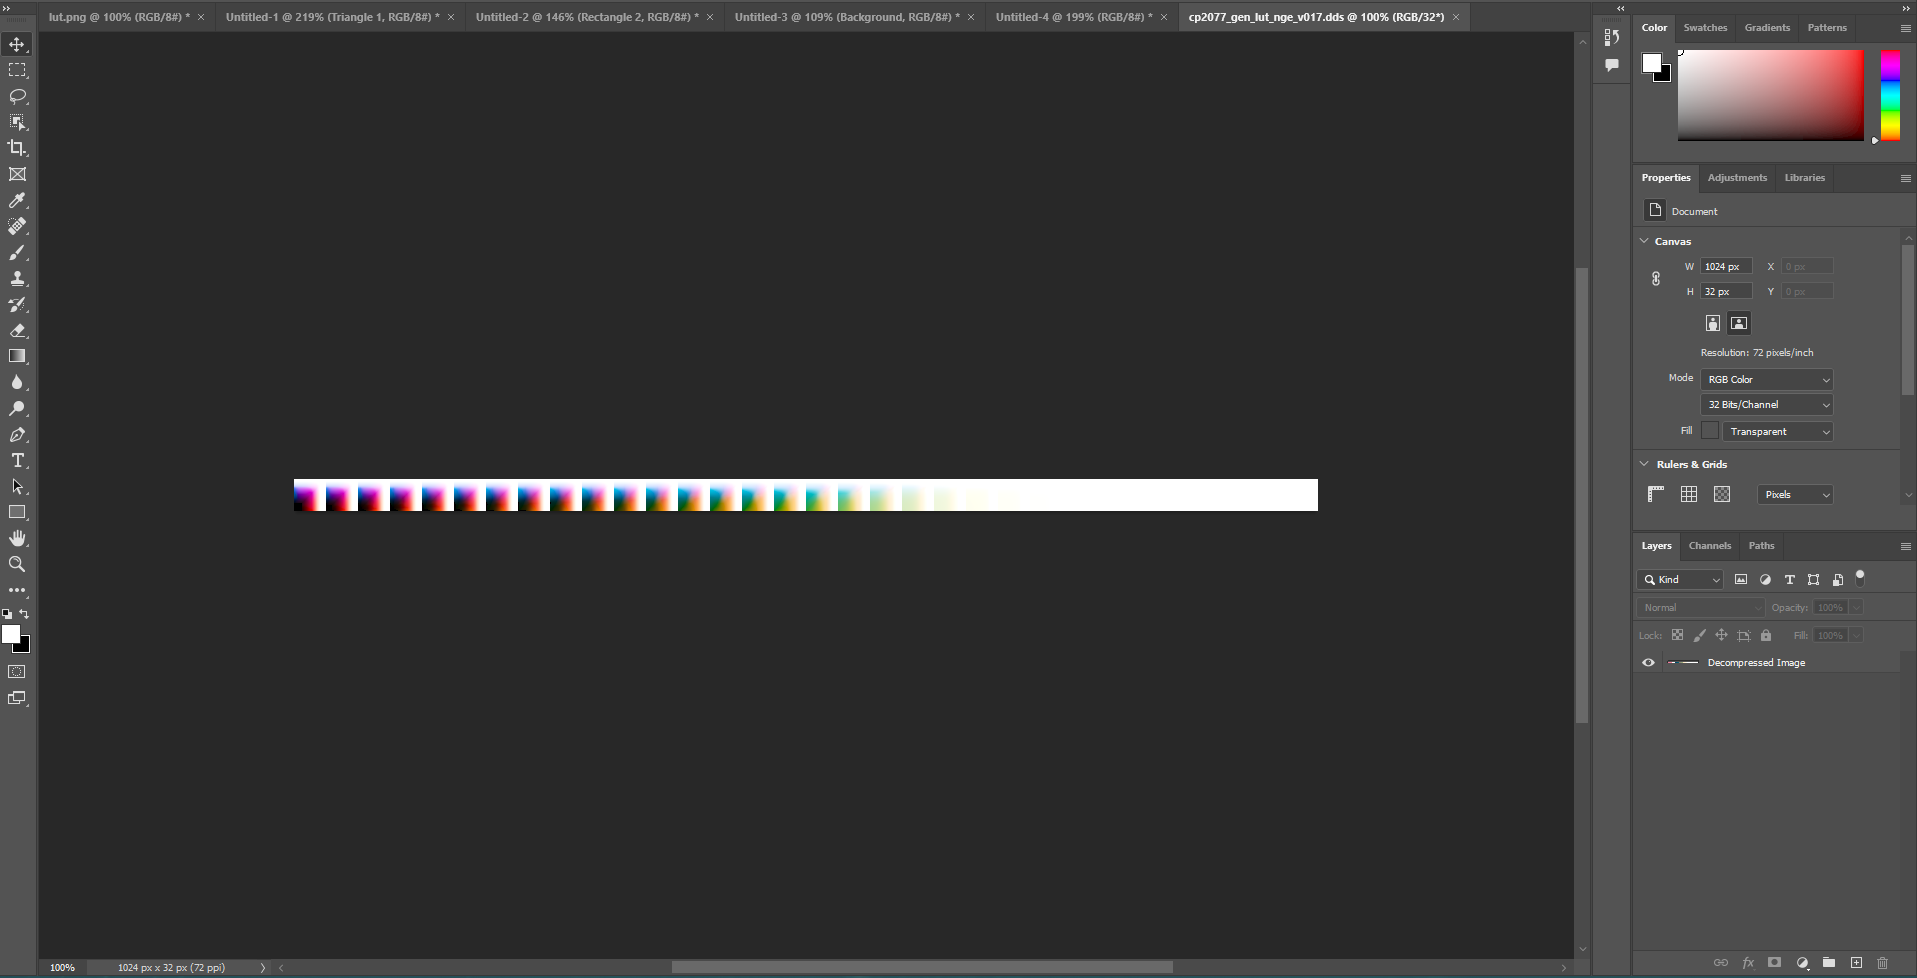
Open it up in Photoshop and... voila!
We now successfuly have the 32-bit HDR LUT imported into Photoshop. You can do any color correction here, or do some ReShade edits in-game and then put that into a LUT image and then use a Photoshop plugin to import it and apply it ontop of this LUT. Make sure you DO NOT simply replace this image with your exported LUT from ReShade or some other editing app, as you will completely ruin the tone mapping the base-game does. I recommend DaVinci Resolve as well and then exporting as as .CUBE
file from inside of it.
When you edit your LUT, make sure you flip the vertical axis (make it upside down) inside of Photoshop!
Let's say I just did some curves tweaking and contrast, etc., etc. Maybe make the green saturation lower and other saturation higher to get rid of the green tint. Now what?!
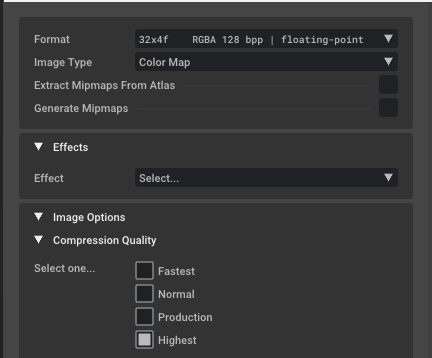
Save back your DDS using NVTT and apply these settings:
Format: 32x4f RGBA 128bpp | floating-point
Generate Mipmaps: OFF
Image Options - Compression Quality: Highest
If you forgot to flip your image inside of Photoshop, turn on the Image Options - Flip Vertically option inside of NVTT.
Open the Wolvenkit project where you have the original LUT of the game in .xbm
Take your newly made LUT and name it the same as the original LUT, so: cp2077_gen_lut_nge_v017.dds
.
Move it to the folder where you exported the original LUT from the game in .dds
format, and overwrite that one with yours.
The folder in question is: yourwolvenkitprojectname\source\raw\base\weather\24h_basic\luts
.
You can also open the exact location from the 'Project explorer' in Wolvenkit. Under 'raw' folder dropdown you should see the exported .dds
file. If you hover over it, it will show a yellow folder button that you can click to open its location.
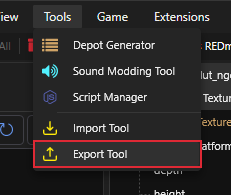
Now to import it, hover over 'Tools' at the top left in Wolvenkit, and select 'Import Tool'.
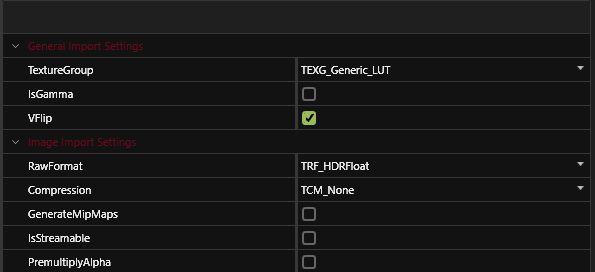
Select the LUT and make sure the import settings are correct
Changing the settings back:
When your LUT imports, double click on the .xbm
file to open it in an editor.
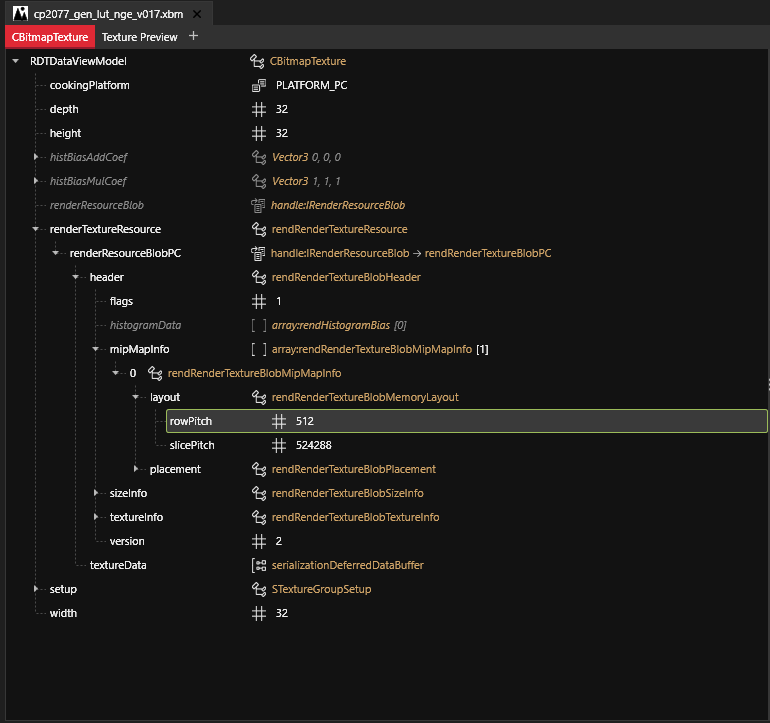
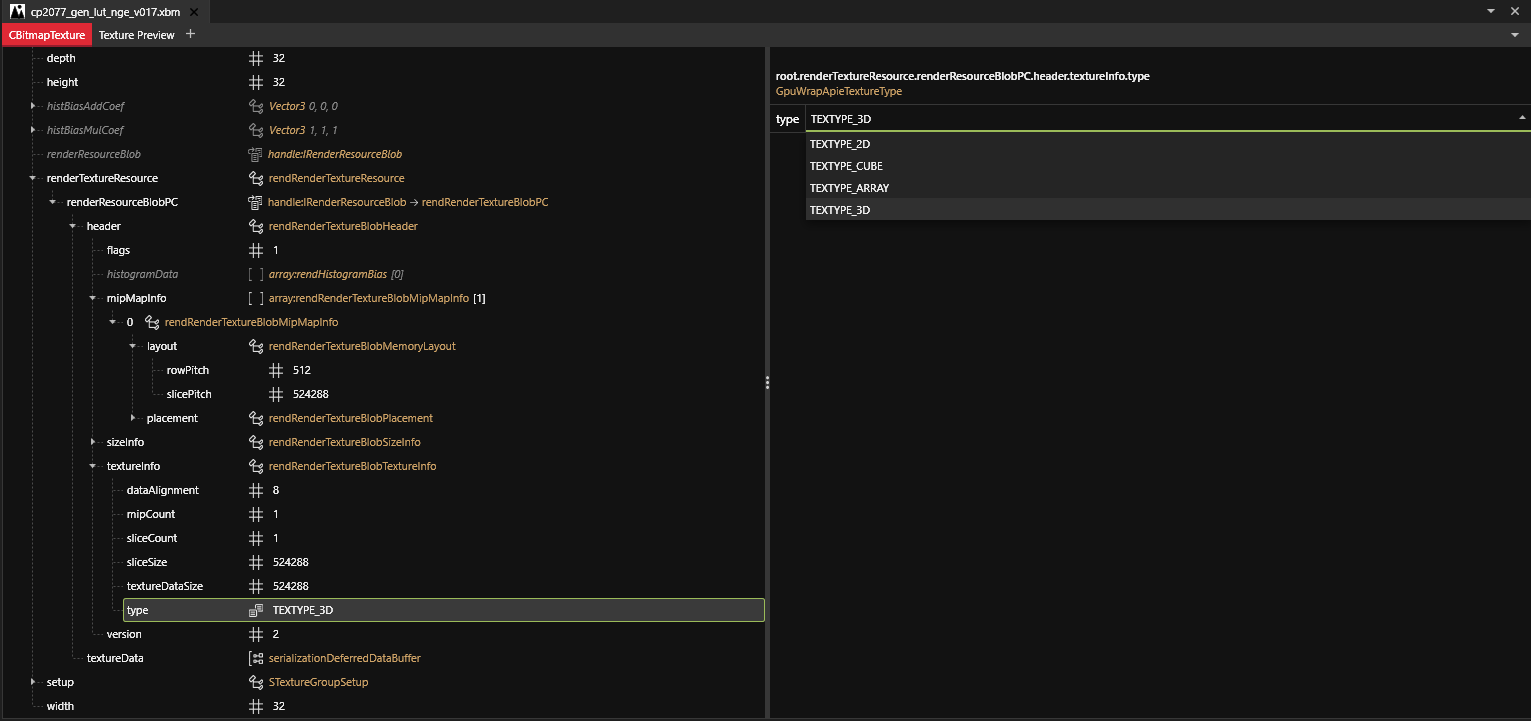
Then change: depth and width in both sections that we modified, back to the default of 32.
Under renderTextureResource>renderResourceBlobPC>Header>mipMapInfo>0>layout
change 'rowPitch' to '512'.
Under renderTextureResource>renderResourceBlobPC>Header>textureInfo
change 'type' to 'TEXTYPE_3D'.
That's it, now either use 'Pack mod' to pack the mod and have .archive file in the Wolvenkit project folder, or 'Install Mod' to preview it in game!
This will replace the sdr LUT for the base game (Night City).
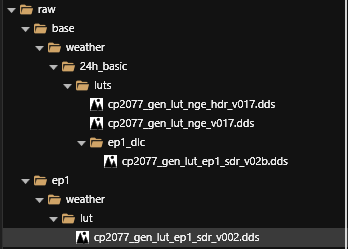
If you want the LUT to also apply to Dogtown, or HDR: cp2077_gen_lut_nge_hdr_v017
is HDR lut. cp2077_gen_lut_ep1_sdr_v02b
and(?) cp2077_gen_lut_ep1_sdr_v002
is Dogtown.
If you want to change these as well, before importing you have to have the paths for these LUTs correct, along with the names.
To achieve this with ease, I suggest exporting the LUTs you want replaced, as they will create paths and give you the names by default.
Then you can go over to their locations, copy your LUT .dds
file, copy the name of the LUT you want to replace, delete the original and overwrite it with yours while making sure it retains the name from the original. Rinse and repeat. Process for importing and adjusting the settings afterwards will be the same as before.
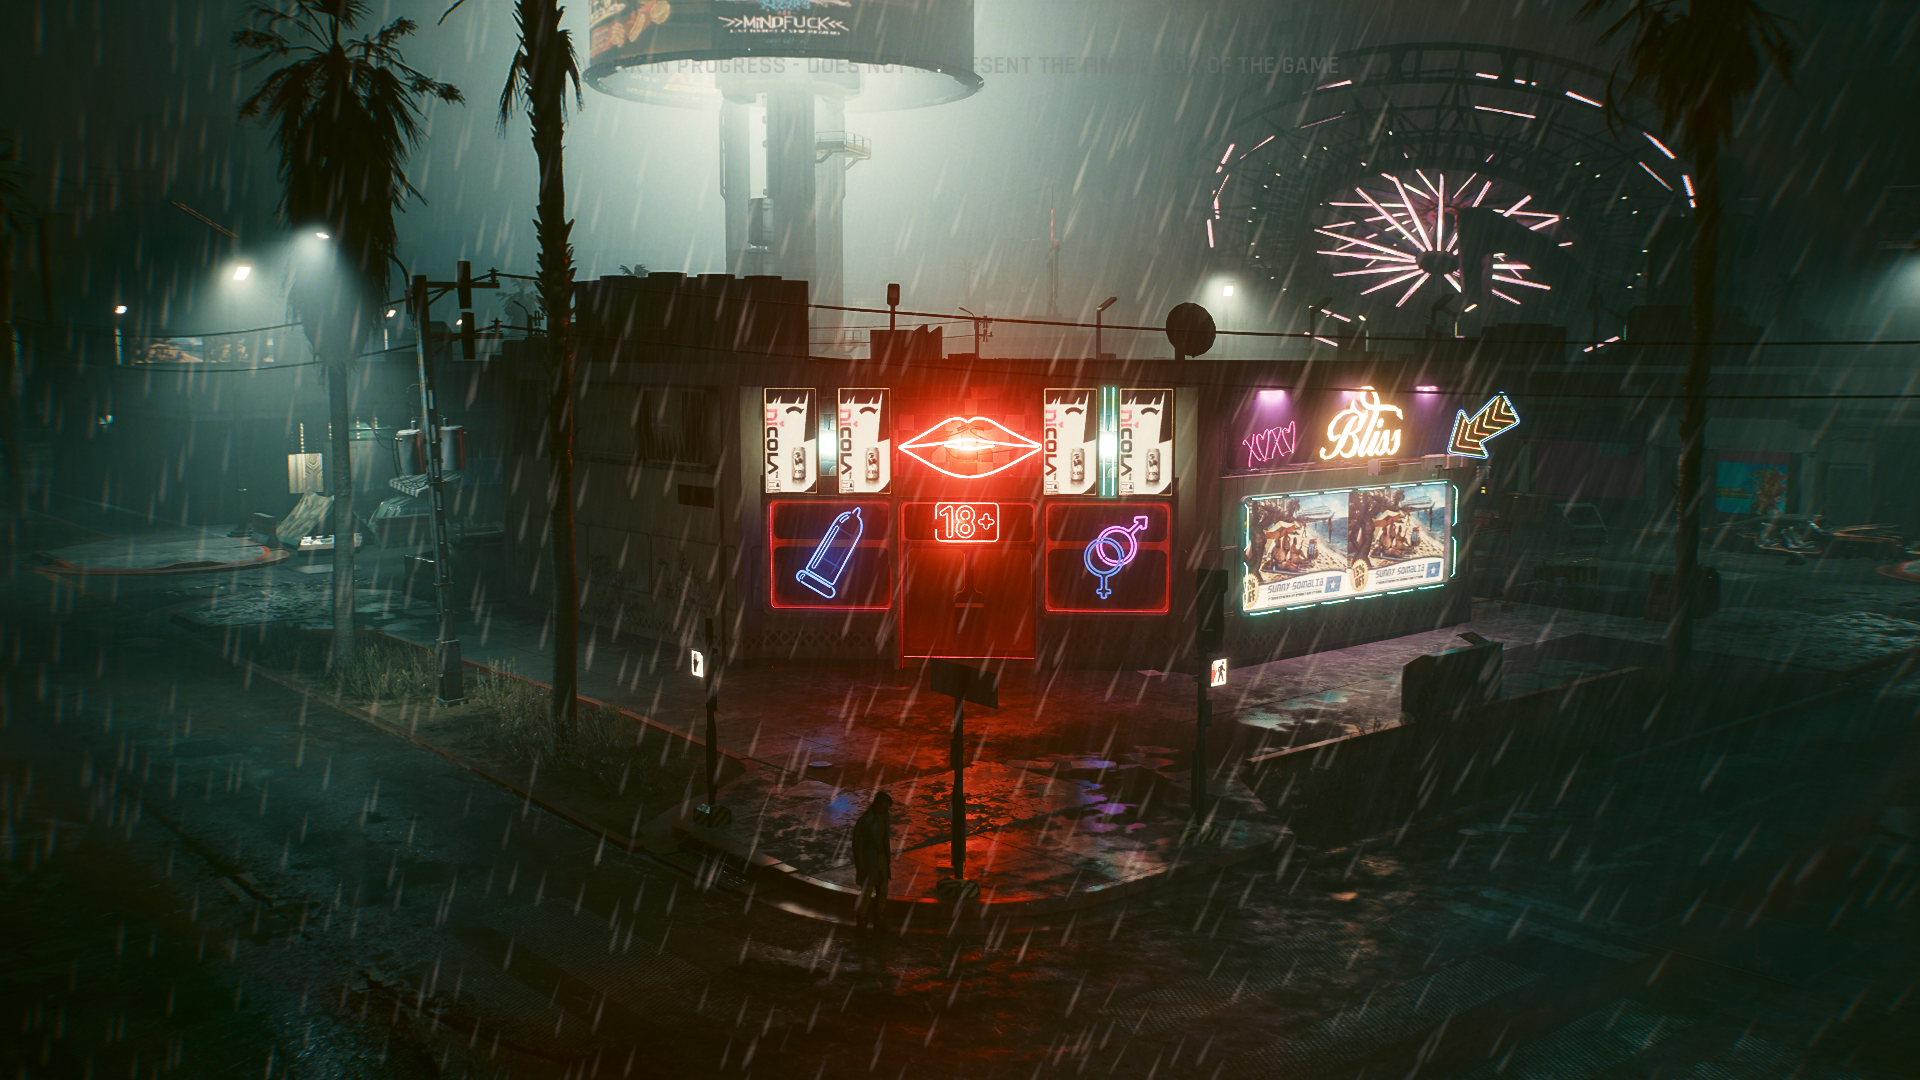
As you can see, vanilla's red saturation leaves more to be desired.
After our edits the red saturation is a lot better and the contrast is more satisfying!