Blender: Getting Started
Things I wish I had known before I jumped into Blender
Last updated
Things I wish I had known before I jumped into Blender
Last updated
Published: May 11 2024 by manavortex Last documented update: May 20 2024 by manavortex
TL;DR: Blender hard, but Blender free and Thog will make 3d object.
Do yourself a favour and read at least General tips!
The open source software Blender is huge and intimidating — it is a tool for professionals, and many people consider it as good or even better than paid alternatives.
While it has a steep learning curve, everyone can dabble in Blender (even you! Even your mom!). This page will give you tips that'll make it easier for you.
Blender is not intuitive to use (perhaps if your knees bend backwards). Our guides usually tell you what to click and teach you keyboard shortcuts. On top of that, Customizing the interface is easy and you should definitely do it!
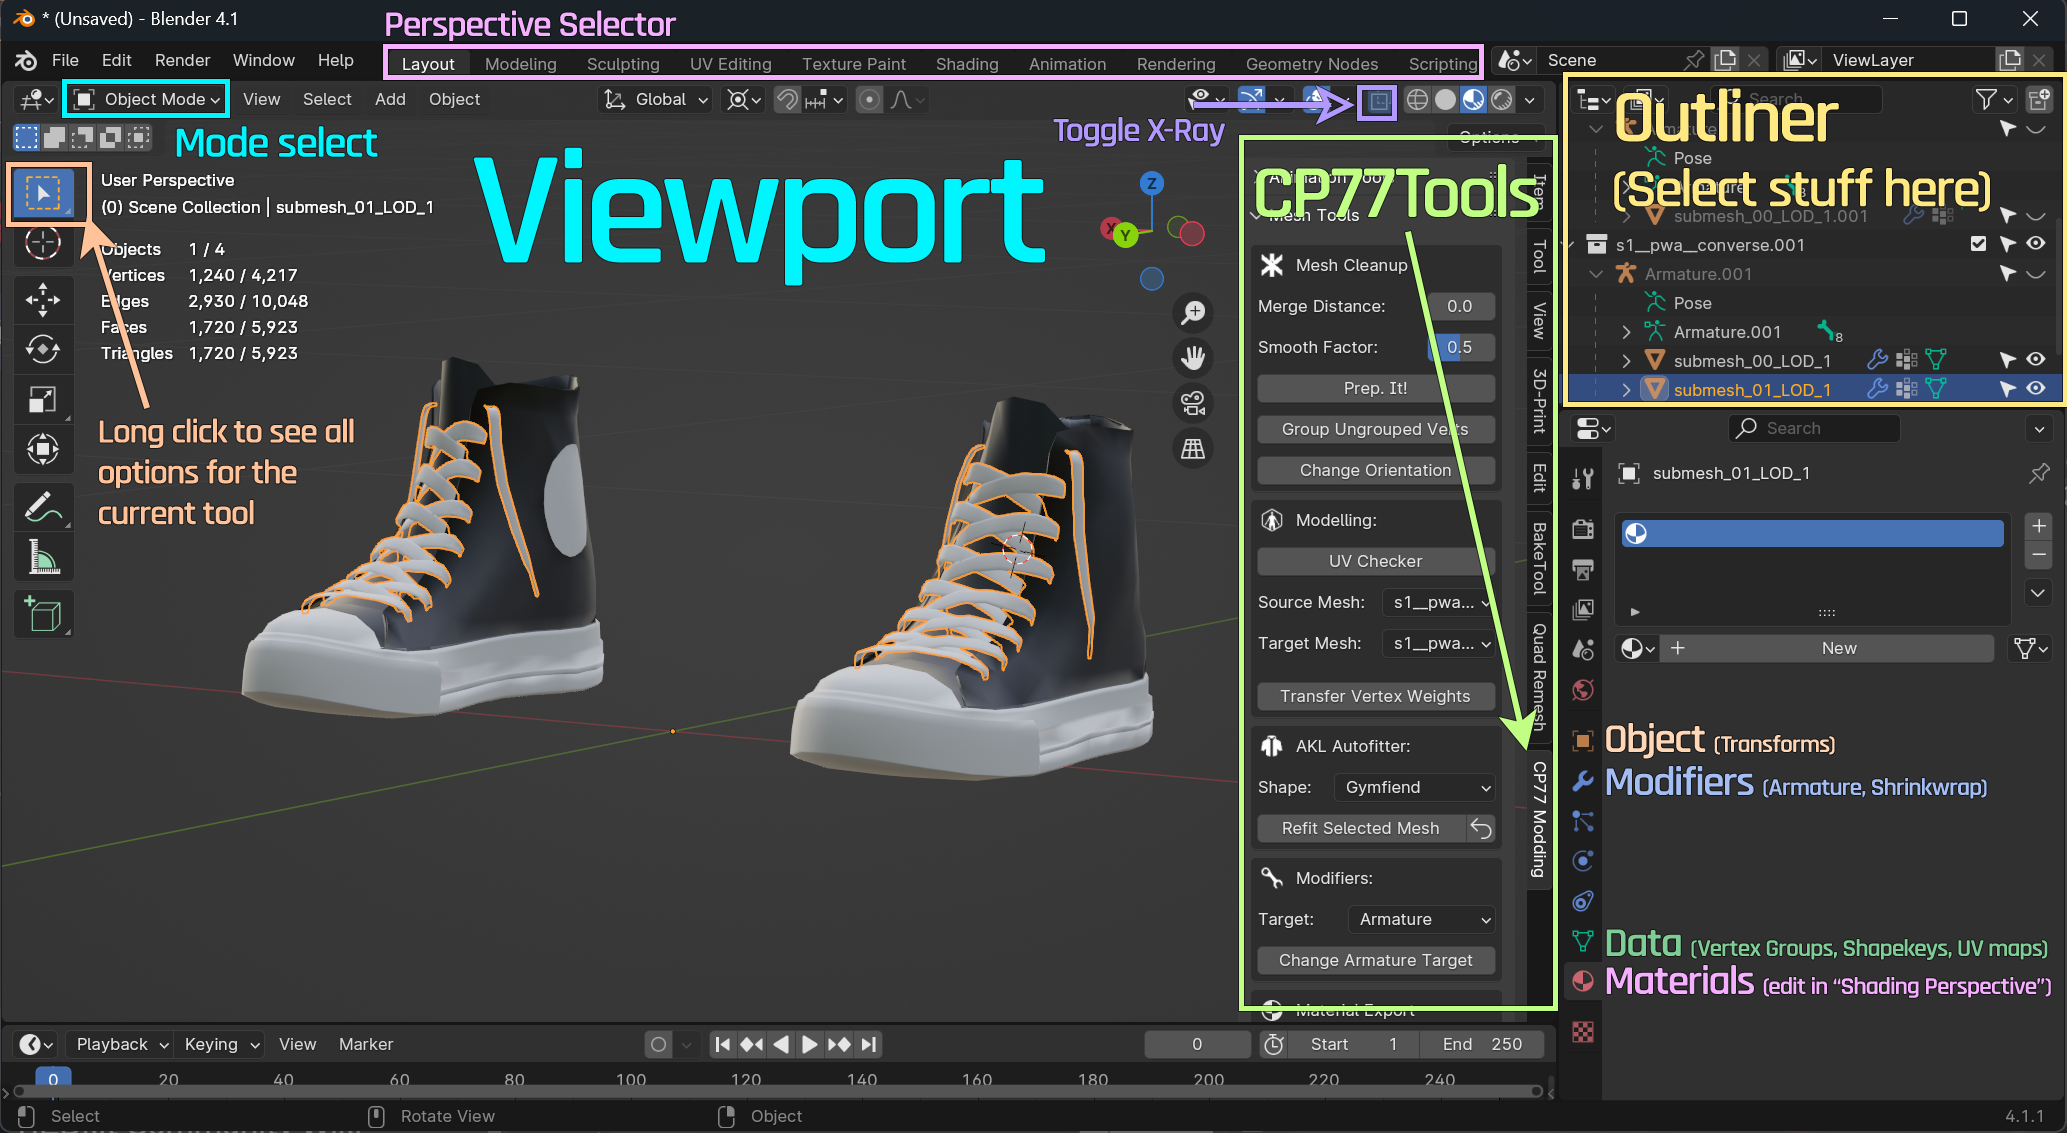
This is Blender's interface. The main action happens in the Viewport. In the default perspective (Layout), it is on the left — you can switch perspectives (workspace layouts) by using the perspective selector (purple) on the file bar.
Read Navigating the viewport for how to move around in it.
Use keyboard shortcuts - they will speed things up by at least 70%. Put a post-it on your monitor and only remove it when you know them by heart.
See Keyboard Shortcuts (global) below for a list
See Customizing the interface for how to create custom shortcuts (it's easy and you should do it)
That being said, use the Search Menu (Hotkey: F3
or Space
, depending on your settings) .
It gives you access to all of Blender's functions! Click on the link to see it in action
The main action happens in your Viewport
(the big one on the left).
You can use the Perspective Selector (pink) to swap around custom-defined workspaces.
Check Customizing the interface for more detes.
Understand when to use Object Mode and when to use Edit or Pose Mode. Read View port modes for more detes.
You can switch between Edit Mode and Object Mode with Tab
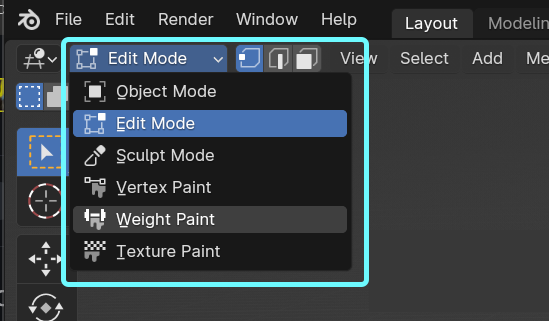
(turquoise dropdown on screenshot 1)
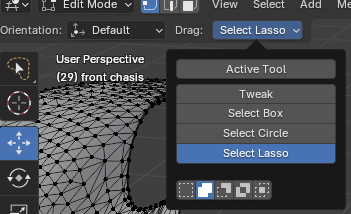
You can switch the current selection tool with a long click on the tool's surface (shortcut to cycle: W
)
You can (de)select multiple things by ctrl-clicking on them.
The most recently selected thing is called Active
(this shows up in many context menus)
The Select Circle tool does not set an Active selection.
You can toggle X-Ray mode (Shortcut: Alt+Z
) by clicking the purple icon in the screenshot above
You can hide things (Shortcut: H
), Unhide them (Shortcut: Alt+H
), or hide everything else (Shortcut: Shift+H
)
You can undo your last action (Shortcut: Ctrl+Z
), and redo an action (Shortcut: Ctrl+Shift+Z
)
Spin the viewport by pressing the middle mouse button
and moving the mouse
Zoom with the mouse wheel
With /
(Numpad Divide), you activate Local Mode
, which will show you only your selection
Press Numpad 5
to toggle between perspective
and orthographic
mode. Try around with them
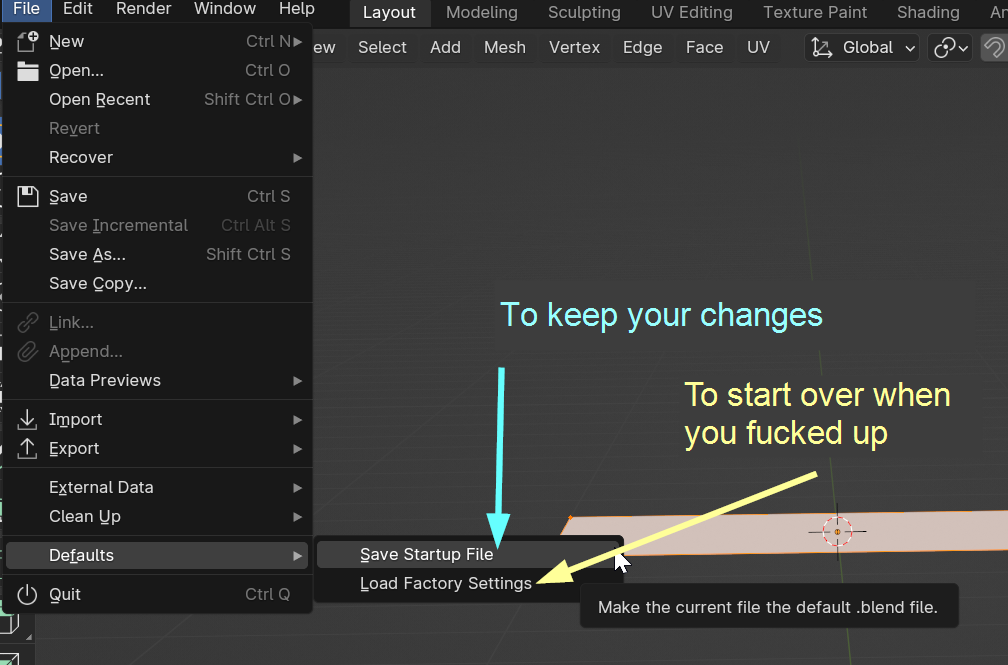
Don't be shy to do this! If you fuck up, you can always restore the default settings!
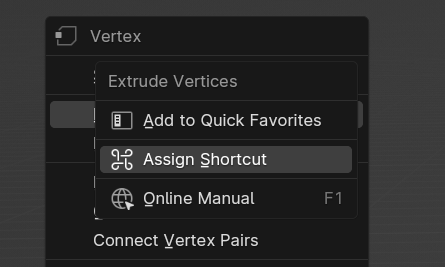
You can easily customize the interface — for example, you can set custom keyboard shortcuts by simply right-clicking on something!
To make your changes persistent, save your current .blend under File -> Defaults -> Save Startup File
.
You switch the View Mode in the dropdown on the topleft. Depending on your perspective, there are multiple options:
You can switch between the most commonly used modes, Object and Edit, with Tab
.
Here's what they do:
Object Mode
This is where you switch the active 3d object. The other modes only work on the current selection. Read Object Mode below for more detes.
Edit Mode
Lets you alter the objects 3d data by moving pixels around. Read Edit Mode below for more detes.
Pose Mode
Only available when you have an armature (rig, skeleton) selected. This is where you make poses.
Sculpt Mode
You usually don't need this! Sculpt the mesh as if it's clay. Requires you to delete shapekeys, and leads to bad topologies. Proportional Editing is much better. See => Refitting: Mesh sculpting techniques.
Vertex Paint
Lets you create Vertex Paint Data. You only need this for custom garment support (so as a beginner, stay away from it)
Weight Paint
Weights determine how an object moves with the armature. Everyone hates it, but you can usually get around weight painting by simply stealing weights from an in-game item.
Texture Paint
"We have Adobe Substance Painter at home!" It's free, it's 3d, but using it sucks. Before switching to Substance Painter, I painted in photoshop and used it just for positioning/rough guidelines.
The shortcuts below are shared between Object and Edit mode:
H
Hide selected elements
Shift+H
Hide everything except for the selected elements
Alt+H
Un-hide everything
X
Delete selection
Ctrl+I
Invert selection
Shift+D
, Click
Duplicate selection
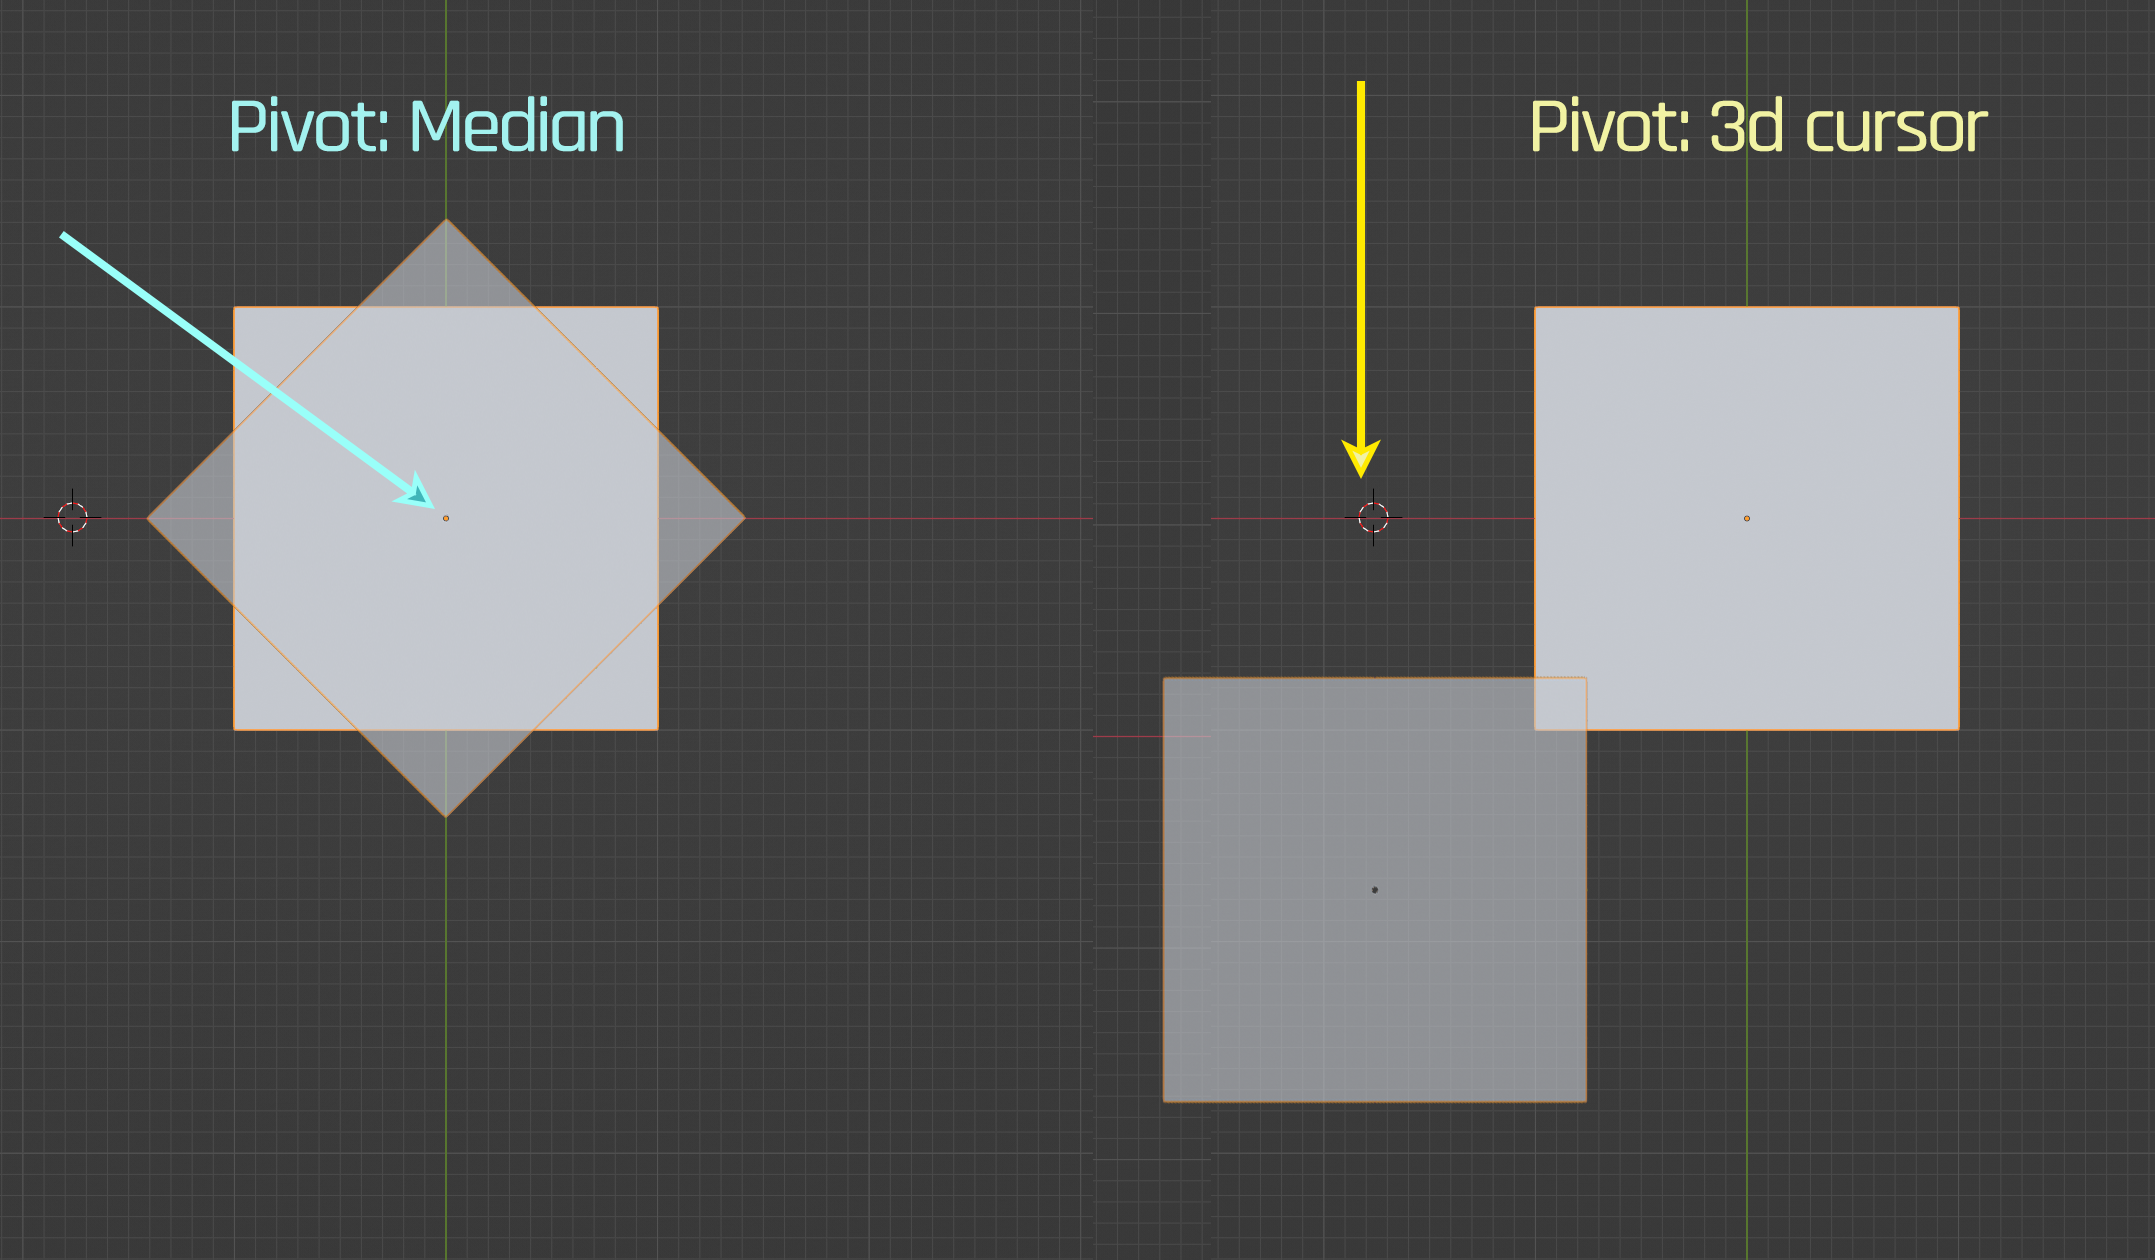
In Object, Edit and Pose Mode, you can use the 3d cursor (Shift-Click
or Shift-right click
, depending on your settings). You can use it as a Pivot Point or just as an orientation mark.
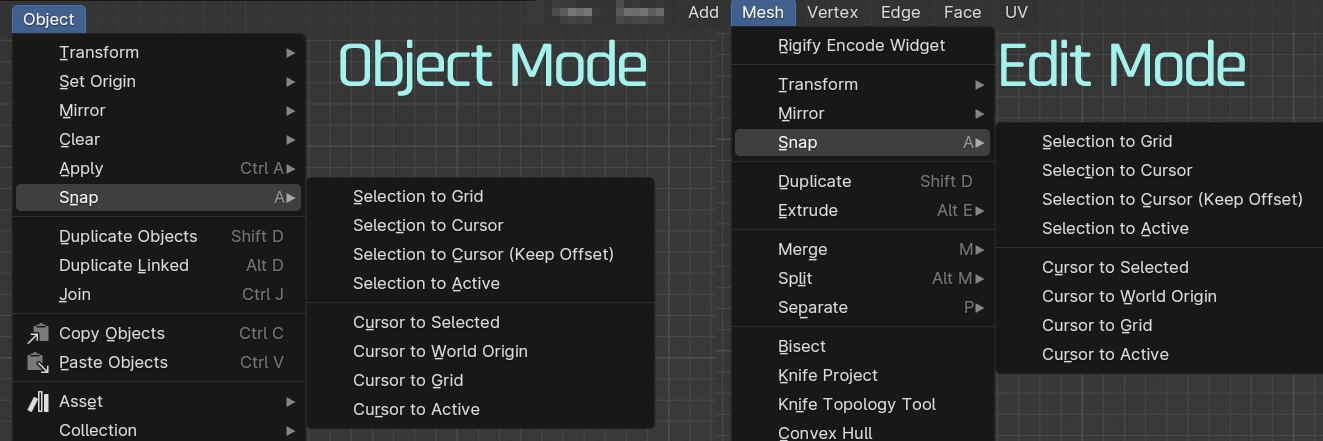
This is especially handy in combination with Snap Selection:
Object mode is where you select stuff that you want to edit.
If you move anything in Object Mode, you need to Apply Transforms (Object -> Apply -> All Transforms), or Cyberpunk will ignore your changes.
Edit mode is where you actually edit the mesh.
You can only edit things that are selected in Object Mode.
Read Selection tricks on how to make your way around this!
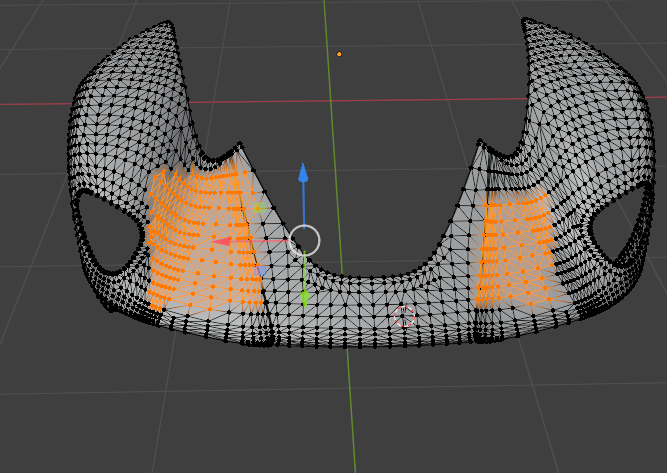
You only edit the current selection (read Selection tricks on how to get one).
Check Pivot Point to change your operation's origin.
With any active selection, you can toggle the following actions by hotkey, and then move the mouse:
Scale (Hotkey: S
): Grow or shrink something
Rotate (Hotkey: R
) What it says
Move (Hotkey: G
) Reposition something
You can lock each of those operations on an axis!
For example, press G
-> Z
to move your selection up and down. Press Z again to remove the lock.
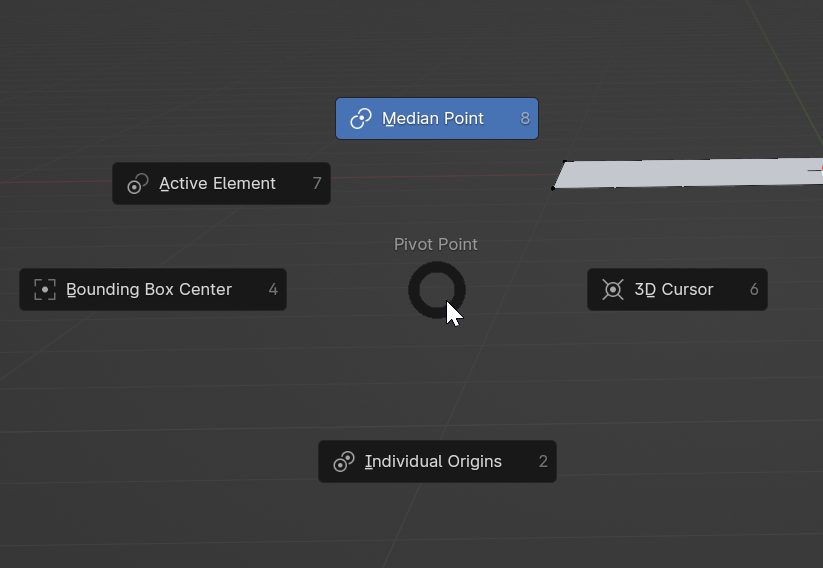
By pressing .
, you can change the current Pivot Point:
This is the origin for your transforms:
Read The 3d Cursor on how to make use of the little dude.
With the shortcuts 1
, 2
and 3
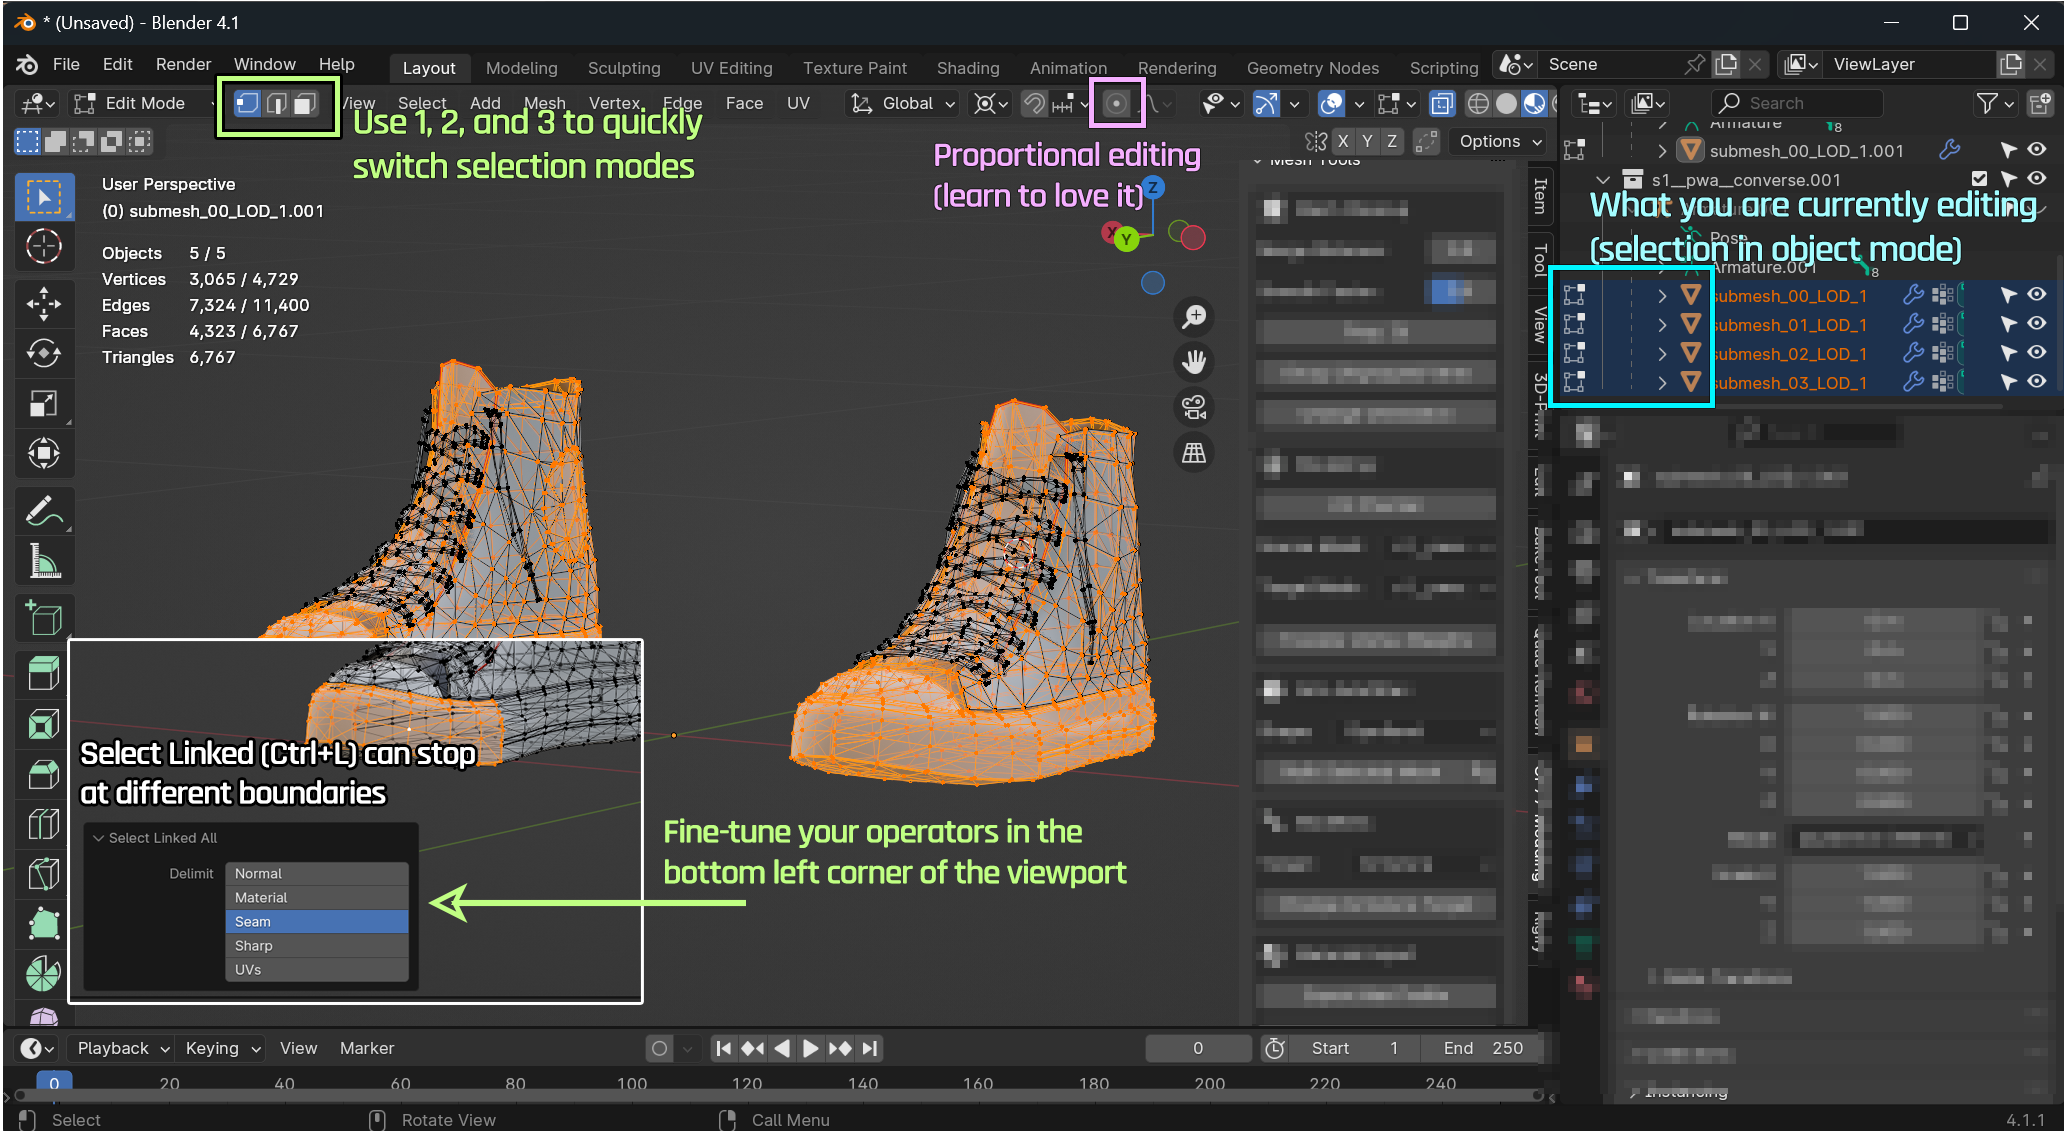
, you can switch the Selection Mode between , , and :
With the shortcut Ctrl+L
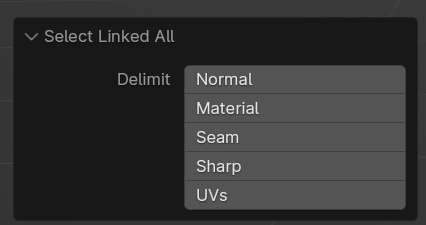
, Blender will select everything up to a certain boundary. By default, this boundary is the same piece of 3d geometry, but in the bottom left corner of the viewport, you can pick the delimiter:
See Seams and Sharps how to make use of this!
Hold Alt
and left click to instantly select an entire loop of vertices, edges, or faces.
This doesn't work well with geometries that are complex or triangulated (Cyberpunk meshes are usually at least one of these things). You can un-triangulate a mesh for easier loop selection (hotkey: Alt+J
), then re-triangulate it again before exporting (Hotkey: Ctrl+T
)
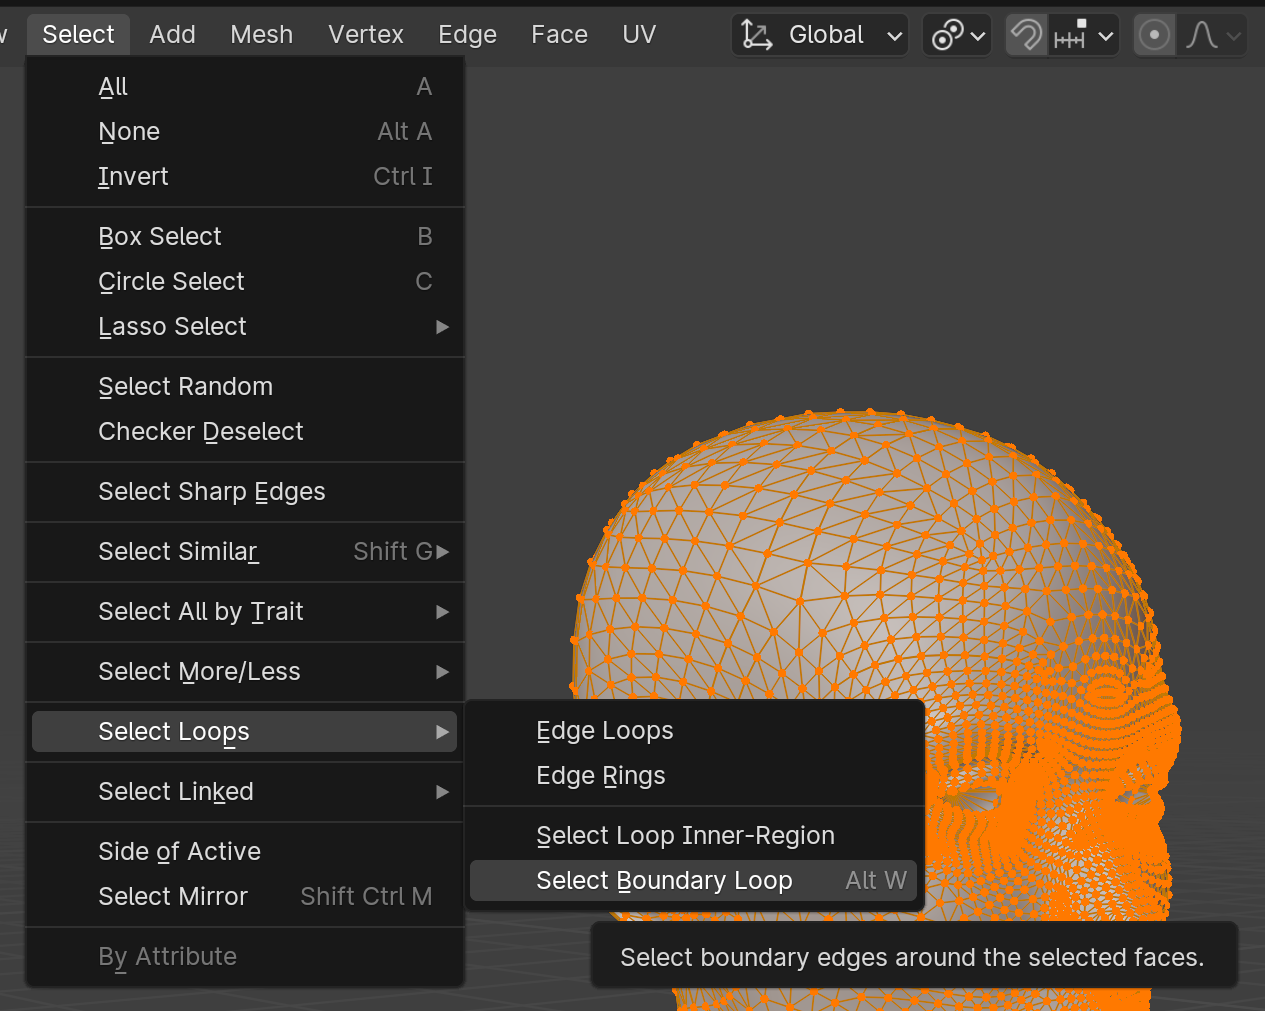
Select all or part of a mesh then navigate to :
this will instantly select all boundary loops for the given selection, great for marking seams
Works in Edge, Vertex, or Face Selection Mode. Select at least one element, then Ctrl+click
on any other element to select the shortest path of edges, vertices, or faces between them.
Double-check that the shortest path is actually the path you want. If it's not, un-do (Hotkey: Ctrl+Z
) and shift-click on an edge closer to your selection.
In Edge Selection Mode (Hotkey: 2
), you can (un)mark edges as seams or sharps via context menu:
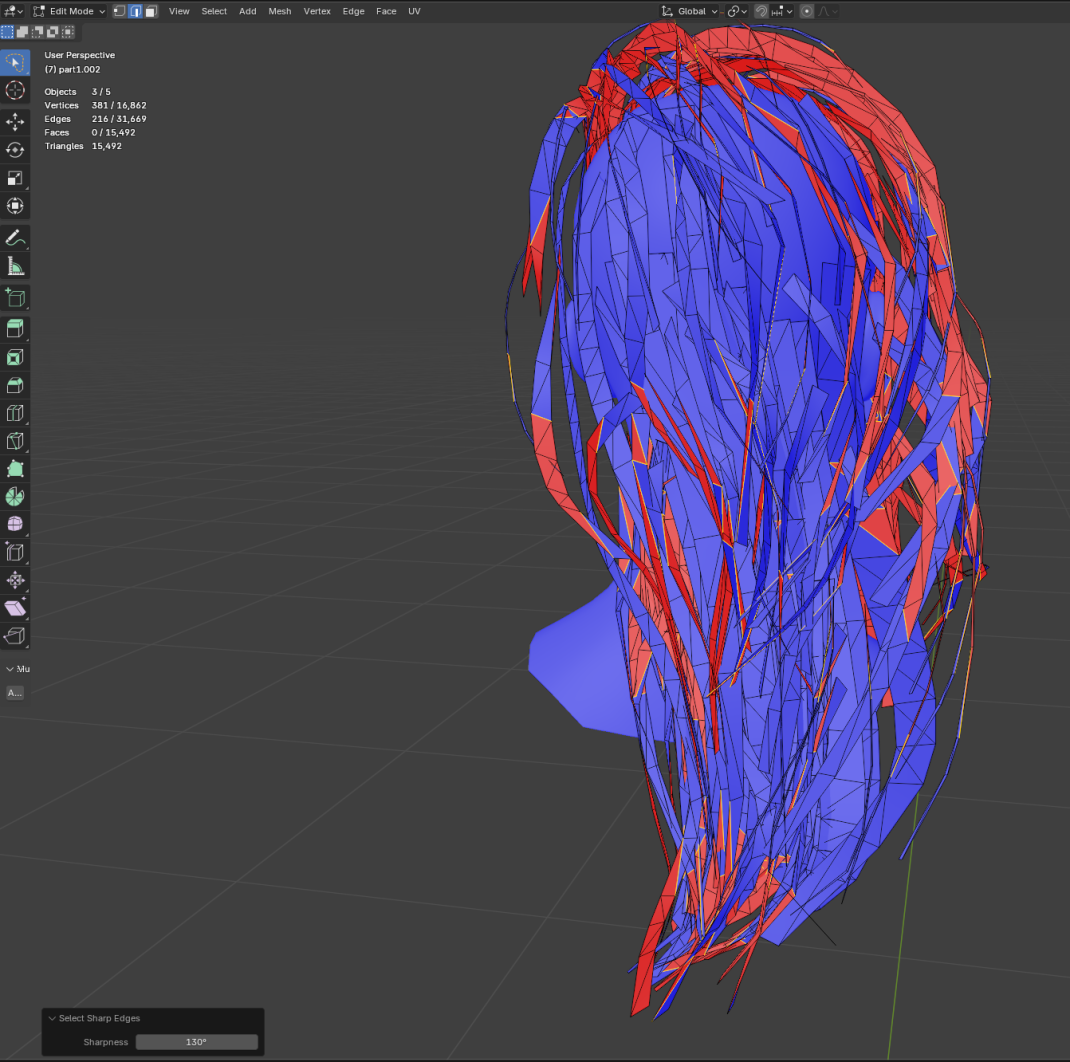
A seam (orange line in the viewport) is where the UV map will be split.
A full explanation on UV mapping blows the scope of this guide, but you can read on if you're curious.
Unless you're UV unwrapping, those won't do anything, and you can use them as selection delimiters to your heart's content!
A sharp (blue line in the viewport) will cause a sharp crease/fold in the material. This translates to Cyberpunk, so it's neat to highlight your edges!
"I'm moving a single vertex, but my entire mesh is affected!"
Sounds familiar? You've run into Proportional Editing.
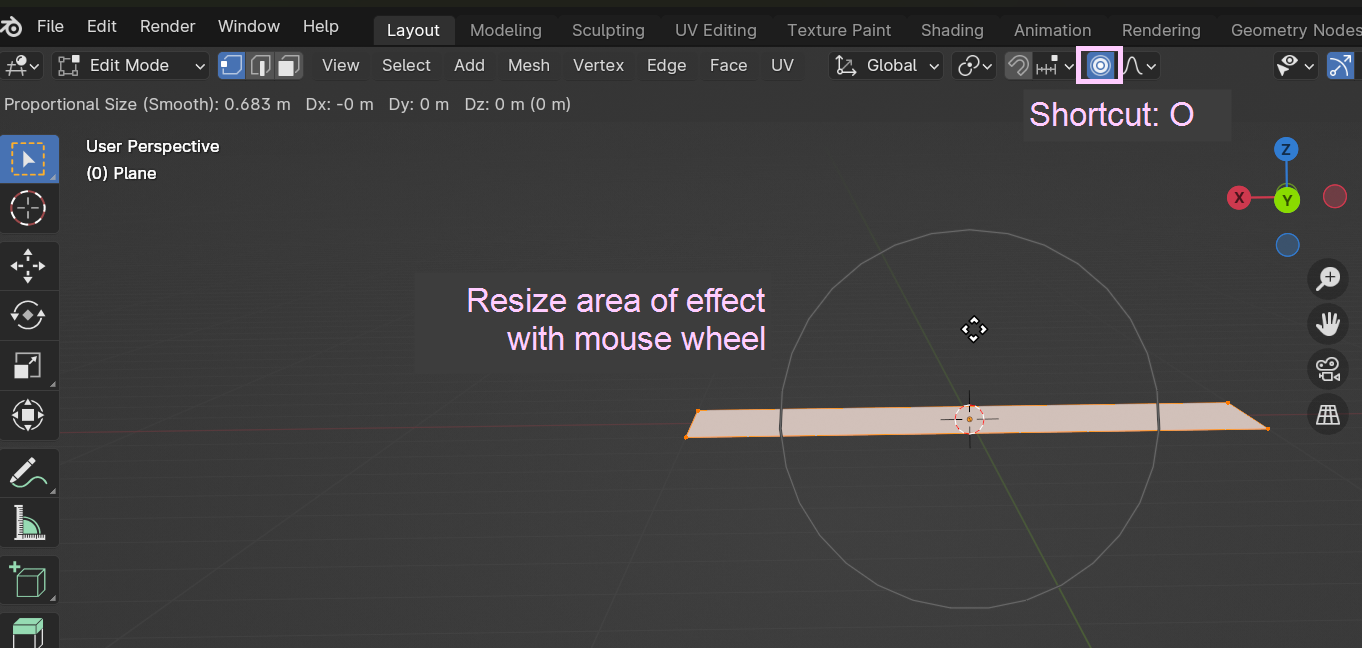
Click the button or press O
to turn it off and on
When it's active, moving, scaling or rotating will have an effect on anything close to your selection. This makes refitting super easy! No more jagged edges!
When you move (G
) or scale (S
) your selection, you will see a circle for the area of its effect.
By default, that circle might be huge and outside your screen. You might wanna change this and then Save Startup File.
You can change the circle's size with your mouse wheel
Blender offers a fully-fledged Python environment, which is used by Netrunners to develop plugins like the Wolvenkit Blender IO Suite.
Since you are reading this, you're probably not one of those. Don't worry! Some of our guides tell you to run Python scripts, but we have a dedicated guide for that: Blender: Running Python Scripts
You can find a detailed guide on this under R&R: Refitting (step by step) ->